A Vermont Interstate Rest Area – Picture taken over 15 years after it was installed. Simple to disinfect. Wash with bleach and water as directed by CDC and you are done.
Scores of customer have taken full advantage of our systems to make spaces very easy to disinfect. Some of them have used our seamless systems on their floors, walls and ceilings. These seamless systems have no place for a virus or bacterial to hide. They are using enhanced disinfecting, and doing so without harming our material.
We can show you how to do this to your facility. Here are some of the kinds of places that this has been done. At minimum most do floors and cove.
Athletic Facilities
Food Manufacturing Facilities
Grocery Stores
Hospitals
Kennels
Laboratories
Nursing Homes
Pharmaceutical Facilities
Research Facilities
Restaurants
Schools
Stores
Veterinary Facilities
Contact Norm Lambert at Epoxy.com Technical Support for more information 1-352-533-2167, norm@epoxy.com
Walls and Ceilings of a Food Wagon. Installation on walls floors and ceiling makes it easy to completely disinfect.
We have many of our customers and their clients doing enhanced disinfecting of Epoxy.com Flooring and Coating Systems. I want all of you to concentrate on worrying about killing viruses and germs, and not worry about damaging the epoxy coatings and flooring you have purchased from us. Be sure to follow the NIH method with bleach below.
The National Institute of Health “Infection Prevention and Control of Epidemic- and Pandemic-Prone Acute Respiratory Infections in Health Care” recommends “1:100 dilution of 5% sodium hypochlorite is the usual recommendation. Use 1 part bleach to 99 parts cold tap water (1:100 dilution) for disinfection of surfaces. Adjust ratio of bleach to water as needed to achieve appropriate concentration of sodium hypochlorite. For example, for bleach preparations containing 2.5% sodium hypochlorite, use twice as much bleach (i.e. 2 parts bleach to 98 parts water).” https://www.ncbi.nlm.nih.gov/books/NBK214356/
You can feel confident to disinfect all Epoxy.com epoxy Flooring and Coating products, this way. Please contact Epoxy.com Technical support with any additional questions that you have at 352-533-2167 or email me directly at norm@epoxy.com
How do I stop chemicals gas vapors from contaminated soils passing though a concrete slab? This is a question I get frequently from owners and environmental mitigation experts.
Background
Chemical contamination vapors tend to pass though a concrete slab and get into the air above. Stopping the migration of the gas through a slab is frequently a requirement of repurposing a space.
The following steps can be used to mitigate chemical vapors into your space above it. Without the right tools these vapors in the air from contamination under that slab can be quite pervasive.
Each job needs to be evaluated on an individual bases. The tools below make the solution less evasive.
Cracks through the Concrete Slab
The most direct way for soil contamination gasses to get in is through cracks. Cracks are the path of least resistance, so most of your vapors come through cracks in the floor. That is a very easy fix Product #684LV – Methyl Methacrylate Crack Healer and Sealer.
The #684LV has about the viscosity (thickness) of diesel fuel. That makes it easy to gravity feed into small cracks small porous areas of the concrete. It welds the cracks back together with a bond strength that is greater than the tensile strength of the concrete. In other words structurally you have the monolithic structure that the concrete was intended to be.
Expansion Joints
Expansion joints are the also a very direct route for vapors to come in. To seal these joints use Product #632 – Chemical Resistant Joint Filler. This is a highly chemical resistant joint filler. It will not only keep the vapors out. If there is going to be a chemical exposure to the surface there will it will stop the chemicals from attacking your concrete and further contaminating the soils below it.
This is where there is a couple of ways to go. You can apply an additional coat or coats of the #12 or go on to Coating the Concrete Slab below. Our optional translucent Synthetic Anti-Skid Fine may be added to the #12 if it is used in additional coats as a clear sealer.
The Product #12 Primer Sealer can also be mixed with silica sand and used as a patching material for potholes and otherwise damaged concrete if required.
Coating the Concrete Slap
In many cases you will want to install a coating over the concrete slab. There are a number of options for doing this but here are a few of the most common ones. The biggest difference between these coatings is the chemical resistance. Please See Chemical Resistance Chart for a comparison of chemical resistance of the products below. All of these products are 100% solid, zero voc. All of the coatings in this section are highly durable and resist the abrasion of traffic.
Epoxy.com Mortar Systems can be used to make permanent repairs that no other kind of product can make. The purpose of this blog is to give you an overview of what you can use and how to use it.
Product Selection – The following are a list of Epoxy.com Products that make excellent epoxy mortars All the products listed below are zero (0) VOC, so it meets even the strictest low VOC requirements, and meets Indoor Environmental Quality/Air Quality (LEED IEQ 4.2 Indoor Emitting Materials Credit). See the individual product component technical data sheets and MSDS for further information.
Product #10 Fast Curing Epoxy Version of Product #10 Lo-Mod Epoxy Adhesive and Mortar Binder.Product #10 Cold Temperature Curing Epoxy Version of Product #10 Lo-Mod Epoxy Adhesive and Mortar Binder.
First and foremost is good surface preparation. Good surface preparation is necessary for most if not all patches to have long term success: www.epoxy.com/surfaceprep.aspx.
Prime the bottom of the whole with some of the neat mortar resin. Neat mortar resin is the liquid (A&B) mixed at the proper mix ratio and stirring in a way to insure a completely mixed product. This will typically take about 3 minutes.
Mix some of the neat epoxy into the Epoxy.com Mortar Blend Aggregate #82 or other appropriate dry clean silica sand gradation.
The amount of sand aggregate depends on the aggregate used.
Typically, the Epoxy.com Product #82 Mortar aggregate can be added at a rate of 18 to 27 lbs. of #82 per 1.5 Qt of mixed resin (1Quart of A to ½ Quart of B).
You will need to recalculate the sand above when using a different sized batch. This is doubly true if using one of or 4:1 mix ratio material.
Shallow patches tend to be a smaller amount of sand filler.
Deeper patches tend to be on the higher side.
If you get a lot of resin to the surface your mix is too wet. If your mixture after it hardens is porous, or weak then you have added too much aggregate.
For a better finish in very deep pours do it in 2 lifts.
Fill all but the last ¼ inch plus or minus with your dryer mix. Allow to cure hard (typically overnight).Fill with a wetter mix on top of that after the first one has cured.
To ensure proper adhesion between layers never wait more than 24 hours between layers.
It is always better to have your patch slightly higher rather than to low. If you are slightly high you can grind the patch back to level. If to low you will need to fill again.
For very shallow fills (1/32 or so) where the sand particles are to large you can use any of the following:
Epoxy.com Product #71 – www.epoxy.com/71.aspx mixed with one the neat (mixed A and B only) mortars above
Clear – Can be pigmented at an additional charge to make it easier to see when pumping.
Elongation (ASTM D-638)
Greater than 10%
Compressive Strength (ASTM D-695)
10,000 PSI (min)
Tensile Strength (ASTM D-790)
3,500 PSI
Concrete Bond Strength (ASTM C-882)
2,290 PSI
Shrinkage (ASTM C-883)
Passed Test
Thermal Compatibility (ASTM C-884)
Passed Test
Adhesion to Concrete (ACI Committee 403)
250 PSI (concrete fails)
Resin Injection
Epoxy resin injection with Epoxy.com Injection Gun designed for Epoxy.com Injection resin is the only way of assuring quality installation. Single component caulking guns, pressure pots, or similar batching equipment are not suitable for injection.
Limit pressures to 40 p.s.i for most applications. Excessive pressures can create additional stressing of the crack. It can also cause hydraulic lifting, rupturing of the cracked substrate, or further elongation of the crack. Low pressures allow gradual resin flow into the crack for deeper penetration. On vertical cracks, injection is start at the lowest point, and continue upward on the crack area. While injecting the lowest port, resin will flow to and out of the next higher port.
When pure resin is flowing out the next port cap, plug the current injection port and move to the next port. Then injection continues in the port showing resin flow. This procedure continues until all ports are full.
Epoxy Injection Resin Systems should be of very low viscosity for most applications. That way it will flow in the smallest hair line cracks. Resin can travel several feet from the point of injection. It may take some time before reaching the next port or penetrating through pin holes in the surface. Coring samples have shown that epoxy injection effectively fills cracks including small voids and hairline cracks.
Injection During Extreme Weather
A cold substrate will cause an increase in the viscosity of the injection resin. This slows down the rate of injection. A hot substrate results in premature jelling of the resin with sequential loss of penetration. During extremely hot weather an open bridge deck may exceed temperatures as high as 140 Degrees F. Special precautions are necessary before injection work can be done in such weather.
The precaution may be shading the bridge, and water cooling. Always check substrate temperature. The injection machine and its hoses require isolation from extremes of temperature.
Epoxy injection undertaken during cold weather also requires special precautions.
When doing injection work in freezing conditions, determining if there is ice present in the crack is critical. Determining if a cracks inner surfaces are ice coated, is equally important. When injecting under these conditions, the resin will not bond to the substrate and no structural rebonding will result. It is usually safer to preheat the portion of the structure you are injecting.
When heating a structure do not overheat it. This closes the crack. When removing heat, the crack may rapidly open. This will rupture the resin before it has a chance to achieve final cure. In most cases, indirect heating is much more desirable than direct heating. Maintain heat for several hours before and after the injection application.
Aesthetics
The color of the sealer material used in resin injection is concrete gray. They are difficult to remove. If aesthetics require complete cleaning, the sealing material can be removed by grinding. This is normally done at an additional charge to the OWNER.
Injection Against A Head of Water
Injection of Epoxy Injection Resin against a head of water requires a slightly different procedure than normal injection. If water is running from a crack, applying a hydraulic cement (fast setting) seals the cracks and sets the ports. Epoxy pastes will not set up under this type of wet condition. The hydraulic cement seals the cracks and diverts all water flow through the injection ports.
Hydraulic cement is fast setting, but it does not have the strength needed for an Injection Sealer. Epoxy Concrete Bonder can have the strength to prevent blowouts or leaks while injecting. After the hydraulic cement cures applyingEpoxy Concrete Bonder. That solves this problem.
The injection process follows the procedures described before. The Injection resin forces the water out of the crack and through the adjacent ports. The resin has an amber color and does not look like water. Pure resin flows from the higher port before capping and moving on. The head of water will require increasing the injection pressure used.
INJECTING DELAMINATIONS & HOLLOW PLANES
Delamination of concrete structures is an area where injection can also offer selective repair. A prime example is bridge decks or other self supporting structures. The most common delamination is shearing of the concrete. This is commonly at the upper rebar mat.
Another common situation is hollow plane that develop when concrete bridge piers are resurfaced. Old piers are encased in new concrete. Hollow planes in this type of application are common, especially against smooth sections of the old pier. Cracking then occurs on the surface perpendicular to the hollow plane.
These delaminated area is subject to chemical penetration from the surface and moisture which may attack the reinforcing bar. If the delamination is not repaired, traffic will cause the area to pop-out by pounding on the delaminated upper concrete layer. Freeze-Thaw damage will also tear the concrete apart. The greater the number of freeze-thaws, the more water in the cracks during these free-thaws, the greater, and quicker the damage to the concrete.
Map delaminations by drag chain, hammer or sounding device. The damaged area requires no less than four (4) ports drilled for resin flow, depending on the size and shape of the delamination. This prevents the trapping of water that may be present.
The delamination is normally hollow planes that run along the reinforcing bar. When injecting the delamination, the resin will follow these hollow planed areas and can travel several feet in filling the voids.
CONCLUSION
Epoxy Injection Systems is very effective at repairing concrete cracks, delaminations, and hollow planes when used according to manufacturers recommendations. Job analysis and proper preparation are very important to insuring the maximum performance from the Epoxy Products, or any other concrete repair products. The right equipment is critical. Proper setup continuous mixing epoxy injection machines must always be used with no exception. Injection staff and management must have the training and experience to do the work right the first time. Epoxy injection has to be done right the first time. There is no second chance. So it is critical that your injection work be done by well trained and equipped, experienced personnel.
Epoxy.com Injection Products
Injection Resin
Product #301 Injection Resin, low Modulus – a 100% solids low viscosity epoxy adhesive used to restore cracked structural concrete by the pressure injection method and to grout cracks in a horizontal plane by gravity.
Product #301SC Slow Cure Injection Resin Low Mod is a longer Potlife version of Product #301
Product #301Cold Temperature Cured Epoxy Injection Resin a faster version of Product #301 typically used in Cold Temperature Cure applications, or where a very fast set is needed
Contact Epoxy.com Technical Support Department for more information on Injection and Binary Delivery Systems. 352-533-2167 info@epoxy.com
Epoxy.com #6930 MMA (methyl methacrylate) SEALER is a 100% reactive semi-flexible medium viscosity methyl methacrylate resin developed as a sealer/topcoat over various Epoxy.com MMA Systems.
Product #6930 MMA SEALER is a chemical resistant coating with improved UV light resistance specifically designed for exterior use such as vehicular parking decks, pedestrian decks, roof decks, pool decks, concrete and steel stairs, ramps, and interior freezer/cooler rooms.
Methyl Methacrylate Product #6930 MMA SEALER is suitable for use in numerous other applications, both indoors and outdoors.
ADVANTAGES
Medium viscosity
Fast cure for rapid recoat and return to service
UV resistance; non-chalking
Semi-flexible for exterior use and freezers
Meets USGBC LEED criteria for low VOC
Chemical resistance
Meets USDA requirements
Use over wide temperature range even below freezing.
For a complete technical data sheet please see the technical data sheet or contact: Epoxy.com Technical Support Department at 352-533-2167, email me (Norm Lambert) at norm@epoxy.com, or visit our website at www.epoxy.com
Here is the picture of the chip floor – www.epoxy.com/chips.aspx that that was about 15 years old when the picture was take. It is in a Vermont Interstate Rest area. It has never been waxed. You can still see the ceiling lights reflecting off the surface. Only maintenance has been to mop it.
Chip Floor install:
Links that will make your Chip Flooring installation better and easier:
Can be Used as a Primer Over Concrete as New as 5 Days
Epoxy.com Product #100 Moisture Tolerant Primer and Base Coat consists of a unique water based epoxy technology which allows the contractor to install epoxy resin floor systems and other moisture sensitive floor coverings on new concrete (5 days old) without fear of moisture entrapment. Epoxy.com Product 100 Moisture Tolerant Primer and Base Coat is applied in a two coat application. Epoxy.com Product 100 Moisture Tolerant Primer and Base Coat is the primer/basecoat used in various Epoxy.com Products
Epoxy.com Product #100 Moisture Tolerant Primer and Base Coat is a unique two-component, moisture tolerant, extremely high density, chemically enhanced epoxy based product which reduces the passage of water vapor and moisture through slabs on, above or below grade, thus eliminating delamination and blistering of adhesives, floor coverings, resin floor systems, epoxy terrazzo and coatings.
Epoxy.com Product #100 Moisture Tolerant Primer and Base Coat controls water vapor transmission levels for the installation of most floor covering systems, including VCT, sheet vinyl, carpets, wood, laminates, epoxy resin flooring and epoxy terrazzo.
Advantages
Vapor and water barrier.
Can be placed on new concrete in as little as 5 days.
Water based – low VOC.
Highly moisture tolerant
Barrier against radon and other gasses
Compatible with most flooring systems – conventional, and seamless epoxy flooring systems.
Does not support the growth of mold.
Easy to install with little down time.
Considerations
Substrate must be at least 50° F during installation and curing
Substrate must be free of dirt, sealers, waxes, and other foreign materials that would interfere with proper bonding.
Must be installed a minimum of 1/8 for use with moisture sensitive floor coverings.
Application
Surface preparation
Surface preparation is the most critical portion of any successful resinous flooring system application. All substrates must be properly prepared as outlined in Epoxy.com Surface Preparation Procedures. Epoxy.com Technical Support Department is pleased to answer any questions.
Mixing
Epoxy.com Product #100 Moisture Tolerant Primer and Base Coat is a two-component material. Do not alter mixing ratios in any way. Part I and Part II are supplied in the correct mixing ratios. Always mix a complete unit in the proportions supplied.
Stir material for approximately 3-4 minutes to form a homogeneous consistency using a slow speed drill and “Jiffy” blade. Do not entrap excessive air. Scrape all sides and bottom of container to ensure thorough mixing.
Priming
Prime using Epoxy.com Product #100 Moisture Tolerant Primer and Base Coat thinned 10% with one (1) pint of potable water per 1.25 gallon unit for good
penetration. Apply with a squeegee and short nap roller to the properly prepared substrate. Back roll with the short nap roller to achieve a uniform coverage. Allow to cure hard enough for foot traffic, about 3-4 hours at 75 degrees F.
Body Coat
Apply one (1) Part of Epoxy.com Product #100 Moisture Tolerant Primer and Base Coat to 4 parts of B. Thoroughly mix with a low speed drill and Jiffy blade until uniform. Mix with low speed drill until uniform and no lumps. Apply with trowel, or squeegee. Allow to self-level and backroll with a looped roller. A 1.25 gallon unit will
cover 30 sq. ft. @ 1/16″.
Broadcast surface with broadcast sand to excess (30-50 lbs./100 sq. ft.) with Epoxy.com Product #77 to achieve 1/8 inch. Sweep and vacuum excess or loose sand after hardening (16-24 hours, depending on temperature).
Top Coatings and Overlays
Apply top coatings or resin floor system directly over broadcast surface. Prime surface with appropriate Epoxy.com primer as required. For vinyl flooring and other floor coverings consult with manufacturer of floor covering.
Physical Properties
Material
2-component epoxy
Density
12.70 lbs/gallon
VOC Content, Mixed
< 1 g/L
Solids by Volume
59%
Flash Point: Part A
Part B
>212°F
170 °F
Mixing Ratio
1:4 by Vol.
Pot Life, Approximate
60 minutes @ 75°F (24°C)
Open to Foot Traffic
After 16 hrs. at 73°F (23°C)
Curing Temperature
Minimum 50°F
Full Cure and Maximum Resistance
7 days
Hardness, Shore D ASTM-D-2240
70-75
Compressive Strength ASTM-C- 579
6500 psi
Flexural Strength ASTM-C-580
2100 psi
Adhesion To:
-New concrete (5 days)
-Moist concrete (28 days)
-Dry concrete (28 days)
110 psi
550 psi
580 psi
Temperature Resistance:
a)Continuous:
-Dry heat
-Humid
b)Intermittent:
-High pressure water
-Dry heat
140°F (60°C)
113°F (45°C)
185°F (85°C)
149-185°F (65-85°C)
Maintenance
After completing the application of Epoxy.com Product #100 Moisture Tolerant Primer and Base Coat and the topcoats or floor covering system, the installer should provide the owner with maintenance instructions relevant to the specific topcoats or floor covering. If floors become slippery due to animal fats, oil, grease, or soap film, clean and rinse thoroughly.
More Information
For more information please visit our website at http://www.Epoxy.com, email me at norm@epoxy.com or call Epoxy.com Technical Support Department at 352-533-2167.
Both Products are two component water- based aliphatic (non-yellowing) polyurethane. both products are free of the health and environmental problems normally found in solvent-based urethanes, while maintaining excellent performance properties.
Both Epoxy.com Product #441 and Product #442 have good chemical, stain, and mar resistance. In addition, it’s easy to clean and has excellent color retention under heavy foot traffic.
Both products high performance coating for use in a variety of seamless floor and wall coating systems.
Both Products eliminates the strong solvent odor normally associated with high performance materials.
They are both ideal for topcoats and finishes that require high abrasion resistance. Typical application areas are clean rooms, hospitals, pharmaceutical facilities, stained concrete, wood floors, and as a seal coat for most Epoxy.com floor and wall coating systems.
How They Are Different
Epoxy.com Product #441 is a satin Finish
Epoxy.com Product #442 polyurethane provides a gloss finish.
Need this Product, Order it Soon
This product cannot be shipped to cold climates in very cold weather, so get your material soon while you still can.
Additional Questions:
For additional information please visit http://www.epoxy.com, email me at norm@epoxy.com or call Epoxy.com Technical Support at 352-533-2167.
Installing Epoxy on Garage Floors in Cold Temperatures
Extend Epoxy Installation Season into Winter
It is that time of year again when I start getting a lot of calls and emails about installing epoxy in cold temperatures.
The best time to protect your floor is before it sees any salt at all. If you have a new garage floor now is the time to protect it. It is still possible to do older floors but the more salt it sees the more difficult and expensive it can be.
The night temperatures are dropping this time of year. It is still possible to coat your garage floor before temperatures drop too low. Our cold temperature epoxies will cure with substrate temperatures as low as 35 degrees F, although it will set a lot faster at 40 degrees F.
Protecting your garage floors is especially important in areas that will see salt from roads or ocean spray. You will want to protect your garage from the ravaging effects of salt deterioration. Without protecting your floor salt will damage your garage floor and make for very expensive repairs later if it is not well protected.
It is not too late to protect your floor even in cold climates if you move quickly now. Without this protection your garage floor will not be as nice come spring as it is now. The damage that takes place is not only aesthetic but structural.
Cold Temperatures Epoxies
Cold Temperature Cure Epoxy Resins allow installation to be done at low temperatures as low as 35°F., (although it sets a lot faster at 40°F) expanding your epoxy coating and epoxy flooring installation season. Epoxy.com Cold Temperature Cure Epoxy Resins can also be used in cold storage areas like food processing areas, where the temperature cannot be raised higher than 35° F or so. Normal cured epoxy typically requires 50°F or more.
Depending on how you mix the aggregate into the products below, they can be used as a mortar for overlays, or a grout for sealing between other hardened construction materials.
Commonly Used Cold Temperature epoxies
Product #1 Cold Temperature Cure Epoxy Coating is 100% solids and specially formulated coatings for cold temperature applications. Cold Temperature Epoxy Coating #1 is able to cure at temperatures as low as 35°F. It has Zero (0) VOCs. Since it has no VOCs, it has no solvent so it meets the strictest possible standard for a low VOC coating. It is often used in coolers and food preparation areas that require constant low temperatures. Product #1 Cold Temperature Cure Epoxy Coating is also frequently used in room temperature applications to meet super-fast cure, limited shutdown needs.
Product #10 Cold Temperature Curing Epoxy Mortar Resin – This product has a low modulus of elasticity (flexibility) and is Low Viscosity. The low viscosity allows heavy loading of the right fillers. The heavy filler loading helps not only to save money, but helps to maintain better thermal coefficient with respect to concrete and steel. The low modulus of elasticity prevents it from being brittle making it less vulnerable to thermal coefficient differences. It also gives it better impact resistance.
Epoxy.com Materials have nearly 40 years of history with their seamless flooring products. These high quality products seldom have to be repaired. There have been a few times with Epoxy.com Products where the floor has been damaged in a fire, or a piece of equipment has been moved exposing an area that had not been done before.
Picture of a Terrazzo Floor patched with an accent color.
The most difficult thing to do in repairing existing seamless floor is matching the color. The solution to this problem is a simple one: don’t try to match it, try to accent it. Do this in a way that it looks like it is part of a design. This adds aesthetic appeal while creating an easy solution to the color matching issue.
Are you going to add additional seamless flooring next to the flooring to be patched? If so use the accent color for the new area of flooring. That helps to tie all the colors back together.
For a complete list of seamless flooring epoxies please visit – www.epoxy.com. You can also email us, or call Epoxy.com Technical Support Department at 352-533-2167.
Product #17 Epoxy Adhesive for Bonding Stone Overlays is a two component, 100% solids high-mod epoxy adhesive used for bonding stone and other aggregates in all types of flooring applications. Some uses of Product #17 Epoxy Adhesive for Bonding Stone Overlays would include patios, pool decks, walkways and other areas where a long wearing and decorative system is desired.
Product #17 Epoxy Stone Overlays give you the beauty of a natural looking shinny stone, without the hassle of the stone needing the constant attention of loose stone. Water actually passes through the system. The #17 Epoxy Adhesive and stone give you a carpet of stone that allows the water to run down away from your feet.
Surface to receive Epoxy.com Product #17 Epoxy Adhesive for Bonding Stone Overlays must be clean and sound. Remove all dirt, laitance, grease curing compounds and other foreign matter by sandblasting, mechanical abrasion, or acid etching. Remove water and dust from all surfaces with an oil-free blast immediately prior to application.
MIXING & APPLICATION INSTRUCTIONS
Temperature of Epoxy.com Product #17 Epoxy Adhesive for Bonding Stone Overlays must be 50° F or above at time of mixing. Stir each component separately before blending. Mix two parts by volume of Part A with one part by volume of Part B for three minutes with a low speed electric drill motor equipped with a mixing paddle. Add mixed Epoxy.com Product #17 Epoxy Adhesive for Bonding Stone Overlays to desired aggregate in a concrete mixer and tumble until wet before removing. Spread onto area with a rake and trowel to produce a smooth surface.
Installation Product #17 Epoxy Adhesive for Bonding Stone Overlays typically uses the #17 Epoxy Stone Adhesive, and clean hard dry stone. A 3 gallon unit of Product #17 will typically mix with about 400 lbs. of stone.
Maintenance
Product #15 Chemical Resistant Epoxy Floor Resurfacing System is typically used for resealing epoxy bonded stone, because it oxidizes much slower than other epoxies, and usually last much longer than other epoxies used for reglazing epoxied stone pebbles.
Prolonged or repeated exposure may cause eye and skin irritation. If contact occurs, wash immediately and seek medical help. Use safety glasses with side shields and wear protective rubber gloves.
CLEANING
All tools and equipment should be cleaned before the system gels. Use MEK, Acetone, or any lacquer solvent.
APPLICATION PROPERTIES @77°F
Mix Ratio
2:1 By Volume
Viscosity (mixed – ASTM D-2393)
2000-3000 cps
Gel Time (ASTM C-881)
25-30 minutes
Tack Free to Touch
7-10 hours
Initial Cure
24 Hours (75% strength)
Final Cure
7 Days
Packaging (unit size)
5 gal., drums
Standard Colors
clear amber
Tensile Elongation % (ASTM D-638)
20-30
Bond Strength (ASTM D-1002)
2400 psi
Hardness Shore D (ASTM D-2240)
75-80
Proper mixing and installation is critical to the optimal success of all product. See Installation Tips,Techdata, & MSDS for more details on our products. Be sure to contact us with any questions and/or concerns that you have.
For more information please contact:
Epoxy.com
A Division of Epoxy Systems, Inc
20774 W. Pennsylvania Ave.
Dunnellon, Florida 34431 Hundreds of Systems,
Since 1980 – 35 years
Florida & Vermont
USA
If your have not read that yet you may want to go back and read it before you proceed with reading this.
Port Setting
It is extremely important that if drilling to use the right tool. to set drill type ports use a vacuum swivel drill. That is a drill with vacuum attached swivel drill chuck and hollow a drill bit.
Concrete dust can be detrimental to the injection processes in several ways. Any dust remaining in the drill hole near a crack can combine with the very low viscosity injection resin. This thickens your resin turning it into a weak paste. This paste can slow or even block the resin flow. Drilling very tight crack with a solid drill forces dust into the crack. This seals the crack from resin flow. Do not allow shortcuts in the drilling procedures! However, for most applications the surface port is the easiest and most effective method.
Port Spacing
Determining the spacing of ports is done by a highly experience applicator. This spacing is a factor of the tightness of the crack and the depth of the concrete substrate. Spacing is normally between four (4) and eight (8) inches.
Port Setting and Sealing
Align ports directly over cracks. That allows injection resin to flow into the crack. Seal surface cracks. Sealing the exterior of cracks is done with Epoxy Gel type Bonder.
Testing The System
Test cracks that are ill defined, or if dust or debris is in the crack. This testing may be done by injecting water into the crack area.
Water left in the cracks will not effect the injection process or the curing of the Epoxy.com Injection Resin. Heavier injection resin forces the water out the cracks. Water injection helps clean the cracked areas. More important, is that it helps avoid the unexpected. This process of flushing the cracks is commonly skipped by more experience contractors, who can tell if there will be a flow of resin, by just looking at them. However, when in doubt water testing is a must.
If the cracks contain algae, chlorinated water containing copper sulfate is injected. After pumping this mixture is left over night. The next morning the crack is flushed by pumping fresh water, into it. This flushes it out before resin injection begins.
Efflorescence builds up on the bottom of a crack in a horizontal slab. Water in the crack extracting soluble calcium hydroxide is the cause. The water evaporates at the surface leaving the lime, which later reacts with the carbon dioxide in the air to form limestone. The inside of the crack, is frequently free of limestone and making it suitable for injection.
Part 4 of this series: Injection Resin Materials Product Selection.
For more information visit our website at http://www.epoxy.com, email us at info@epoxy.com or call our technical service department at +1 (352) 533-2167.
Epoxy Structural Concrete and Wood Repair / Waterproofing
The following article is written with enough information about resin injection systems to help protect the Owner from the misuse or improper installation of an injection systems. For more information contact me: Norm Lambert.
As with all repair and rehabilitation of concrete, the initial job analysis is by far the most important step. Epoxy Injection Resin will weld concrete cracks but, of course, will not repair the cause of the cracking.
Analyze each potential injection application to determine the exact cause or causes of the cracking. Correcting the cracking problem can be fairly simple, or may be difficult involving design changes.
Consult a structural engineer when design changes are necessary. Do this before starting the injection. Repairing cracks by Injection is effective after these design changes. Prevent future cracks by fixing the original cause of the cracking, when ever possible.
Parking garages are an example of cracking problem that require a structural engineering analysis. Often inadequate design for expansion/contraction is the cause for parking garage structural cracking. Avoid weld injecting a crack if there are not enough expansion joints. Sometimes flexible overlays such as Epoxy.com System # 495 can be used to overcome this defect. This does not however encapsulate the rebar in a way that will totally stop the premature deterioration of the steel. Often times additional joints are needed, thus the analysis of cracking problems is critical.
Bridge decks and slab on grades can often be repaired with Epoxy.com Product #684LV crack healer and sealer and save some of the cost of doing epoxy injection.
For more information visit our website at http://www.epoxy.com, email us at info@epoxy.com or call our technical service department at +1 (352) 533-2167.
Epoxy Structural Concrete and Wood Repair / Waterproofing
The following article is written with enough information about resin injection systems to help protect the Owner from the misuse or improper installation of an injection systems. For more information contact me: Norm Lambert.
One of the most versatile, problem solving products available in epoxy systems today is Epoxy Injection Resin. Structural restoration of concrete by epoxy injection is very often the only alternative to complete replacement. It therefore results in large cost savings. Injection protects the rebar and stops water leakage.
Epoxy injection of concrete cracks has been used for decades. When properly installed it is still working as well as it did right after it was installed.
Epoxy Injection Resin is a system for welding cracks back together. This welding restores the original strength and loading originally designed into the concrete. Epoxy injection restores the structural qualities the concrete design intended. In other words under most conditions it makes the concrete as good as new. It creates an impervious seal to air, water, chemicals, debris, and other contamination.
Other waterproofing injection systems like urethane resin will seal the crack from water but will not repair the the member structurally. That makes the structure member vulnerable to additional structural decay. This structural advantage that an epoxy injection repair gives, makes it the best choice for most situations. Epoxy or Urethane Injection discusses when to use epoxy and when to use urethane.
A crack, obviously, is a sign of failure caused by stresses, inadequate design, improper curing, etc. One of the dangers of a structural crack is the effect that it has on the reinforcing bar. The reinforcing represents one of the main structural values of the concrete.
Cracks left unprepared allow moisture, road salts and other contaminants to penetrate and attack the rebar. The rebar deteriorates, losing the structural value. Loosing the entire structure is often the result.
Epoxy injection resin has two purposes. First, it effectively seals the crack to prevent the damaging moisture entry. Secondly, it monolithically welds the structure together. Most people assume that this welding of the structure is the most important result of the repair. Actually what is most important is the sealing.
The sealing properties of the injection prevents premature deterioration of the reinforcing. This can be of equal, or in some cases greater importance than the structural welding. It would theoretically always be desirable to get this welding effect.
For more information visit our website at http://www.epoxy.com, email us at info@epoxy.com or call our technical service department at +1 (352) 533-2167.
Low Viscosity Fast Setting Methyl Methacrylate (MMA)
Permanent Crack Repair System
MMA CONCRETE CRACK HEALER and SEALER Product #684LV is a 100% reactive ultra-low viscosity methyl methacrylate resin used as a penetrating crack sealer or to fortify extremely porous concrete substrates. MMA CONCRETE CRACK HEALER and SEALER Product #684LV is typically used on bridge decks, parking structures, concrete floors or as a general penetrating sealer to prevent moisture intrusion.
MMA CONCRETE CRACK HEALER AND SEALER Product #684LV is a reactive methacrylate resin, which hardens rapidly with the addition of Product #695 MMA HARDENER, even at low temperatures.
ADVANTAGES
Fast Cure (60 min.) for Rapid Recoat and Return to Service
Ultra-Low Viscosity for Excellent Absorption Into Concrete
Protects Against Water Penetration
VOC Compliant (100% Solids)
Full Strength in 1 Hour
Use Over Wide Temperature Range – Even Below Freezing – Adjust for Temperature in the Field
CONSIDERATIONS
Substrate must be dry and free of dirt, waxes, curing agents and other foreign materials.
Should not be installed on fresh concrete until maximum shrinkage has occurred (at least 30 days after placement).
COMPOSITION
MMA CONCRETE CRACK HEALER and SEALER Product #684LV is a 100% reactive methyl methacrylate resin. Color is supplied is clear.
USES
Bridge Decks
Containment Structure Floors
Plant Floors
Concrete Slab on grade
Suspended Concrete Slab
Virtually any horizontal concrete surface
For more information about repairing infrastructure visit our website at: http://www.epoxy.com, email us at info@epoxy.com or phone technical support at +1 (352) 533-2167
You can easily build containment in the middle of an existing slab
Building a secondary containment structure in the middle of an existing facility is very common and effective way to protect the facility structurally as well as protect the environment. It is very easy to do. Here is how:
Drill holes into the concrete and fasten #4 bar into the concrete with Epoxy.com Product #2006 – www.epoxy.com/2006.aspx – Gel Adhesive. Allow Epoxy to cure overnight.
Form the area to receive concrete curb.
Coat the floor area in the bottom of the forms to receive the concrete for the curb with Epoxy.com Product #2007 – https://www.epoxy.com/Epoxy_Fresh_Concrete_to_Hardened_Concrete_2007.aspx – Wet to dry concrete adhesive. Pour your concrete before the #2007 becomes tack free. That will make it as if the curb and the concrete floor had been poured at the same time.
An alternate method to this is to install concrete brick around the area bonding in place with Product #2006. This will help to reduce waiting for the concrete to cure if you use the poured concrete method above.
Cove the inside of the containment curb with Epoxy.com Product #720 – https://www.epoxy.com/720.aspx – coving resin allow to cure overnight.
Prime the inside of the containment area with Epoxy.com Product #12– www.epoxy.com/12.aspx – Chemical Resistant Primer, and allow to cure overnight.
Install 2 coats of Epoxy.com Product #633 – www.epoxy.com/633.aspx – Chemical Resistant Novolac Epoxy Coating.
Summary
Doing an effective job of building secondary is easier than you may think. For more information visit our website at http://www.epoxy.com, call our technical support department at 352-533-2167 or email us at info@epoxy.com.
Introducing highly chemically resistant Novolac epoxy wall coating. Bring your chemical resistance to new heights. Apply this Novolac Epoxy Wall Coating on walls in thicker coats, with less runs. Same great chemical resistant Novolac Epoxy as Product #633, but thicker.
Description
Epoxy.com Product #633W is a 100% solids epoxy novolac coating ideal for harsh chemical and solvent environments. “W” designates High Viscosity formulation for improved film build on vertical surfaces. Epoxy #633W can be used as a seal coat for various Epoxy.com products and systems where extreme chemical resistant performance is required, such as secondary containment, solvent storage, pump pads, trenches, chemical process areas, and other high exposure areas.
Exhibits excellent resistance to strong acids, alkalis, and most industrial chemicals and solvents.
Can be applied in occupied facilities.
Can be applied in cool damp conditions.
Can be rapidly re-coated in ambient conditions.
Considerations
Good surface preparation is one of the most important parts of the installation of a high end coating. Be sure to follow our Surface Preparation Guide before installing this product.
Mix small batches of the material with 2 parts “A” and one part “B”, being sure to completely mix for 3 min. Mix only what you can use in half the potlife. Remember the bigger the batch the faster it will setup in your bucket
Installation methods will vary from job to job. Typical application is by brush and quality roller.
Contact Epoxy.com Technical Support with any questions that you have.
Proper mixing and installation is critical to the best success of all epoxy products. This page is to help you find the right installation information that you need to install Epoxy Resin Systems.
Surface Preparation for Epoxy Resin Installation
All quality installation start with quality surface preparation. This guide will help you to know how to properly prepare your substrate for installation of Epoxy or any other high quality resin system. Improper surface preparation could turn what seems to be a simple process into a lengthy, difficult repair.
Do and Don’t do with epoxy.
These guides will help you to not make the common mistakes that people do and the things the people don’t do that can lead to a problem or even a failure of your epoxy resin installation.
Job Supplies Required to Install Epoxy Resin Systems
This list is a suggested list of the materials that you will need for most typical epoxy coating systems. This list is also useful for installing roller applied coating systems like Epoxy.com Chip Flooring.
Epoxy Chip Flooring Installation Guide. Floors have a special role to play in interior design. The heavy technical demands made on floors often make the use of certain decorative products simply impossible. The use of color chips can change all that! Color chips are increasingly being used in combination with “wet” products such as Product #315 Seamless Polymeric Multi-Colored Flake Chip Floor Resurfacing System to create decorative floors with more to offer than other ornamental products…Quality! This installation guide takes you step by step through the installation of Epoxy Chip Flooring Product #315.
Product #1 High Build Epoxy Coating 21-27 mils – All Purpose Epoxy Floor Coating Installation Guide.
Product #1 All Purpose High Build Epoxy Floor Coating a two component, zero (0) VOC, 100% solids epoxy Hi-Build epoxy coating used for high foot traffic and light to moderate forklift traffic areas where abrasion resistance is required; for protection against mild corrosion and as a decorative waterproof coating for walls, floors, tanks, etc. Installation Guide For All Purpose High Build Epoxy Floor Coating #1.
Product #633 Novolac Epoxy Chemical Resistant Epoxy Coatingis a 100% solids epoxy Novolac coating ideal for harsh chemical and solvent resistant applications. Product #633 Novolac Epoxy Chemical Resistant Epoxy Coating is used in secondary containment, solvent storage, pump pads, trenches, and other high exposure areas. This Installation Guide will help you install Product #633 Novolac Epoxy Chemical Resistant Epoxy Coating. You can also find more information with pictures about installation on this page the Epoxy.com Blog.
Epoxy Injection Installation
Epoxy Injection – This Guide will take you through the basics of doing epoxy injection. Epoxy injection is one of the most economical, to make a structural repair and waterproofing in cracked concrete.
Additional Installation Guides
These are just a few or our most popular products for additional products and guides pleas contact us at:
For more information visit our website at: www.epoxy.com , call technical support at 352-533-2167 or email us at info@epoxy.com.
A customer asks, “I recently saw what looks like a creek bed built out of epoxy with stones in it. How is this done in epoxy?”
Here are the steps to do it:
Choose your stone. The stone that you choose can be uniform in size or a blend of stone sizes and shapes. If bigger stone is going to be used, it is recommended that you use a blend of larger stone with smaller stone. Variations in shape will also help to increase the amount of surface area holding the system together, making it stronger. Be sure the stone is clean and completely dry before attempting any of the steps below.
Make a mock-up of the complete system below in a small box made out of plywood or similar material. This will verify everything from stone selection, to aesthetics, to stone durability. It is also gives you a chance to practice your procedure,and get additional phone tech support from us if required before you proceed with your project.
Construct the recessed area that your river will “flow”. That could be a recessed area in a concrete floor, a wooded shadow box or some other “box” to hold your river. Be sure the box is watertight and that the surface is properly prepared before proceeding –www.epoxy.com/surfaceprep.aspx
Prime the area created in step 3 with Epoxy.com Product #12 – www.epoxy.com/12.aspx at a rate of 250-300SF per gallon. Allow to cure until hard to the touch, typically 6-8 hours
After the Primer in Step 4 is hard to the touch and before 24 hours has passed, apply a coat of Epoxy.com Product #1 – http://www.epoxy.com/1.aspx – 100% solids General Purpose Epoxy Coating to the bottom of the box created in Step 3. This will help to give you a consistent background color. Black helps give you the illusion of infinite depth.
Optionally you can add a second coat of the #1 Pigmented Epoxy Coating to increase color intensity.
On the other hand if the stone in Step 6 is so deep that you will not be able to see through it you can skip this step and proceed to step 6.
Allow the epoxy in Step 5 to cure hard to the touch before proceeding, typically 10-12 hours. Do not wait more than 24 hours before moving on to Step 6.
Properly mix Epoxy.com Product #17 – www.epoxy.com/17.aspx – Epoxy Stone Adhesive Part A and Part B. Add your stone into the mixed stone adhesive. The amount of stone that you will be able to add to it will vary depending on size and how clean the stone is. 100 lbs per 3 quart batch (2 QT “A” and 1 QT “B”) is a good starting point. This ratio should be verified in a mockup before proceeding to this step. Mix in the stone until a uniform shine can be see on all the stone. Install this mix into your “box” at the desired thickness. Be sure to pack it in tightly and level to the desired surface. Allow to harden overnight. Do not wait more than 24 hours before moving on to Step 7.
Properly mix and pour Epoxy.com Product #214 – www.epoxy.com/214.aspx – Table Top and Casting Epoxy into the spaces between the rock in step 6. You typically will want to pour a minimum of 1/8 inch or not more than 1/2 inch at a time. Take care to break any bubbles as you go early and often. This is typically easy to do using a hair dryer and/or Isopropyl (rubbing alcohol mist). Allow each layer to harden and cool before adding another lift. Never wait more than 24 hours in between coats and/or pours of epoxy.
When you complete this project it will look like a stone riverbed filled with \ water. You can also experiment with other objects in your stone mix. Contact Epoxy.com Technical Support with your questions: info@epoxy.com or 352-533-2167
How to Seal Around an Existing Floor Drain with Epoxy
The Problem
A food processing facility owner writes, “I have a second floor production area that has a long stainless steel trench drain around the center of the room. We hose the area down with hot water, a crack is developing next to the drain that allows water to leak by into the room below. The floor below my quarry tile is concrete.”
Cut a V in the concrete next to the drain to increase the bonding surface to the drain. If you cannot cut a V chip away some of the concrete next to the drain. In other words you are trying to cut away or break away the concrete around the drain to give more surface area for the epoxy to come in contact with. The additional thickness of epoxy (against the drain) gives you extra protection against leaks. The deeper you chip away next to the drain, the more bonding surface to seal against the drain. You need to be careful not to go all the way through the concrete. If you do you will most likely have to install a form around the drain with plywood or similar material (under the concrete)to hold up your epoxy when you go on to Step 7.
Grind or otherwise abrasively clean the edges of the drain to remove the shine and roughen it up. It is not so important that you have deep scratches. It is necessary to totally remove all shine off the edge of the drain.
Remove all dust, dirt and debris by vacuuming. If compressed air is used be sure it is oil free.
Prime the edges of the drain with Epoxy.com Product #660 – http://epoxy.com/660.aspx -Aluminum Filled Primer. Product #660 Universal Primer and Finish cures to a tack-free finish in 1-2 hours and can be recoated between 2 and 24 hours @ 75°F with 50% Relative humidity
Mix a small batch of neat (just resin and hardener, not filler) Product #10 – www.epoxy.com/10.aspx. Use this mix to prime all areas that the patch (Step 8) will need to bond to. Apply this to all concrete surfaces as well as to the surfaces primed with #660 Aluminum Filled Primer (Step 6). You can either let the material in Step 7 set overnight and continue with the this step within 24 hours of priming,or you can move to the next step immediately. The purpose of this primer is to make sure there is a secure bond between the patch which will be a dry mix of epoxy and aggregate and the other surfaces that would otherwise be dry. This reinforces the bond line between the patch (in Step 8) and all surfaces it will need to bond to.
Make a mortar of properly mixed Epoxy.com Product #10 and Epoxy.com Mortar Aggregate Product #82. Trowel the mix in to level the space between the drain and the remaining tile. Be sure to trowel the surface smooth. Allow to cure overnight.
Do a squeegee coat of the properly mixed neat (no aggregate) Product #10 to seal the patch installed in Step 8.
Allow to cure until it is hard to the touch, typically 10-12 hours at 75 degrees F.
Daily Maintenance of Seamless Flooring and Floor Coatings
Sweep the floors daily.
If abrasive particles are present they should be removed by mopping with common household detergents and rinsed completely. Be sure not to use the detergent at a concentration higher than that recommended by the manufacturer of the floor cleaning material. Be sure to test any cleaner that you haven’t used before on a sample of the Seamless Flooring Material or Seamless Floor coating. You may want to be sure to prepare these samples as you are installing the floor so they will be available to you at a later time.
Promptly remove grease, and other contaminants from the surface of the floor
Be sure to rinse off all chemical solutions that may attack the surface.
Weekly Maintenance of Seamless Flooring and Floor Coatings
Smooth Systems
All seamless flooring and floor coatings should be mopped on a regular bases with a neutral soap or detergent, and completely rinsed. Be sure not to use the detergent at a concentration higher than that recommended by the manufacturer of the floor cleaning material.
Be sure to test any cleaner that you haven’t used before on a sample of the Seamless Flooring Material or Seamless Floor coating.
Mop should be rinsed often. Synthetic mops tend to work better on textured surfaces than cotton mops. The water should be changed frequently as well. Smooth floors are easily cleaned this way. It may be necessary to give extra care to areas that are subject to heavy traffic, hard rubber wheels, and steel wheels that leave marks. In these situations you can use the methods used for textured floors for these more difficult to remove contamination.
Textured Systems
Textured systems may require the use of a stiff bristled brush or floor scrubber to reach to bottom of the anti-skid texture. Severe problem areas can be treated as follows:
Grease Removal
Grease is typically removed by Tri-sodium phosphate (TSP) or other commonly available biodegradable cleaner. Contact Epoxy.comTechnical Support Department with your specific questions.
Removing Dairy Products
Dairy products should be removed immediately as they may cause staining on some types of seamless flooring and seamless floor coating systems.
Tire Marks Removal
Scrub the area(s) with a stiff bristled brush and using the same biodegradable floor cleaner that you are using to mop with.
Stubborn Dirt or Stain Removal
When you are trying to remove stubborn dirt or stains,allow the biodegradable cleaner to set in the area for a little while longer and do the work for you. Then completely rinse to area to remove the cleaner and the dirt.
Chemical Spills
You should always rinse strong chemicals as quickly as possible completely from the surface. Chemicals allowed to dry on the surface typically become more concentrated as they dry. That may cause the chemical to get concentrated enough to stain or even attack the seamless floor or seamless floor coating.
Waxing and Polishing of Seamless Flooring and Seamless Floor Coatings
Epoxy.com Epoxy and Urethane Seamless Flooring and Seamless Floor Coating Systems are very shinny and so waxing or polishing are not necessary. If a floor is very old, or has seen extremely high traffic this shine may dull. If it does then you can wax or polish the floor with standard commercial products that are designed for that purpose. Better yet, if this happens, you may want to renew or refinish your system – see below.
Renewing and Refinishing Seamless Flooring and Seamless Floor Coating Systems
Epoxy.com Epoxy and Urethane Seamless Flooring and Seamless Floor Coating Systems are designed to withstand heavy traffic and wear. However, if there is enough traffic and/or abuse to cause the system to loose its shine, or show visible signs of wear, you may wish to restore the floor by “re-glazing” it. Before re-glazing a flooring system or coating system you need to do the following:
Remove all wax, oil, grease and other contaminants from the surface
Lightly sand to break the shine
Consult with Epoxy.com Technical Support Department for the proper material to re-glaze you floor. Be sure to follow all directions for installing the re-glazing material.
When in doubt contact Epoxy.com Technical Support at: info@epoxy.com or call us at 352-533-2167. You can also visit our website 24 hours per day at www.epoxy.com
Requirements for a Chemical Resistant Epoxy or Vinyl Ester
Our Epoxy and Vinyl Ester product lines has extensive uses in Chemical Containment
and Chemical Resistance projects. The kind of product and systems we recommend are
based on a number of factors. First we need to know exactly what you are doing:
Are you patching concrete that has been damaged already? If so what is the extent
of the damage?
Do you need a secondary containment coating? If so what kind of traffic (if any)
will this area see? Many of our systems will handle very heavy traffic.
Are there any cracks that need repairing? If so how many lineal feet of cracks
are there, what is the average depth and what is the average width. Repairing the cracks
is the first step in making your project water and chemical tight.
Are you looking to grout tile? We have chemically resistant Epoxy Tile Grout that
has excellent chemical resistance.
Is there any petroleum oil saturated concrete in the area. If so we have a product
for that too.
Is there any moisture vapor that is being transmitted through the floor? We
have solutions for that so please bring that to our attention when you contact us.
Is this in an area where Static Disruptive or Conductive materials are needed (typically
only in an explosive environment or where delicate electronics must be protected
from static discharge).
Total square footage of area requiring Chemical
Resistant Epoxy or Vinyl Ester.
Then we will need to know some specifics about the chemical you are trying to protect
against:
What is the specific chemical (or chemicals) that you are trying to resist against?
What is the specific concentration of the chemical (or chemicals)?
What is the duration of the exposure, before it will be cleaned up (if ever)?
Is the exposure at an elevated temperature? If so what is that temperature, and
how long will the chemicals be at this elevated temperature
If you have this information when you contact us, we can quickly help you to decide
what chemical resistant system is best and most economical for you.
Here is some additional reading that might interest you.
A customer writes, “I have a machine shop floor. The concrete has had a lot of oil on it over the years. I need an anti-skid floor that will be easy to clean and will hold up to cutting oils and anti-freeze and protect the environment.”
We have done exactly what you are asking many times. A mechanics shop floor typically is done the same way. Here is how:
2.Properly mix and apply 1 coat of Epoxy.com Product #201 – www.epoxy.com/201.aspx oil stop primer to all oil saturated or potentially oil saturated areas at a rate of 200-300 SF per gallon. Allow this to harden and inspect for good bond (see “Checking the Bond” below. If any areas are loose return to step 1. If everything is well bonded proceed to next step within 24 hours of this step.
3.Properly mix and apply 1 coat of Epoxy.com Product #899 – www.epoxy.com/899.aspx – applied at a rate of 250-300 SF per gallon. Allow to cure hard and proceed to next step within 24 hours of this step.
4.Properly mix (including optional but recommended anti-skid 4a below) and apply first coat of Epoxy.com Product #2 – www.epoxy.com/2.aspx – at a rate of 160-200 SF per gallon per coat by brush or roller. Allow to cure hard and proceed to next step within 24 hours of this step.
5.Properly mix (including optional but recommended Anti-Skid – http://www.epoxy.com/non-skid-additive-polycarbonate-aggregate.aspx 5a below) and apply 2nd coat of Epoxy.com Product #2 – www.epoxy.com/2.aspx – at a rate of 160-200 SF per gallon per coat by brush or roller. Allow to cure hard for 24 hours at 70 degrees F. for light traffic, 48 hours for light traffic.
a.Mix optional but recommended Epoxy.com Anti-Skid to the #2 at a rate of 12-16 ounces per gallon of mixed epoxy. Mix completely into the mixed A&B #2 before applying the #2
Checking The Bond
There are a number of ways to check the bond of a floor. A simple way with Epoxy Flooring is to try to separate the epoxy from the concrete. That can be done with the corner of a putty knife or a screw driver. If you can remove the coating cleanly from the concrete without pulling concrete it is likely that you have a bond problem. If you cannot get it off or you must dig off concrete to get it off, you most likely have a good bond.
So many of you are now scratching your head, trying to figure out how I can devote an entire article to what to use our epoxy table top resin for.
Characteristics
Product #214 Water Clear Epoxy Casting – Tabletop Resin – Bar Top Resin is an all-purpose, low viscosity epoxy resin system for coating wood and concrete counter tops, tabletops, bar tops and similar applications. It has excellent clarity and color retention. Our clear casting resin and tabletop resin / bar top Epoxy has zero (0) VOC making it essentially odorless and can therefore be used in occupied areas. It de-bubbles and flattens a lot easier than similar materials.
Casting Resin
Our epoxy table top resin is frequently used as “casting resin”. It is poured into forms typically made out of silicone. The material is allowed to harden and then forms removed. This can be for very small parts or it can be used for very large parts.
Table Top Resin as Flooring
Product #214 Epoxy Table Top Resin can be used when a super flat floor is required. It is possible to get a floor as flat as water. This is important under certain types of machinery such as MRI machines and equipment used to product high precision parts for use in items like space satellites.
Other Uses
Product #214 Epoxy Table Top Resin can also be used to make tiles. After they cure they can be installed with conventional methods or with Product #225 Epoxy Tile Grout.
The epoxy table top resin that we sell has also been used for dance floors, stages, theme parks and homes to produce a floor to simulate water. Often times this is done with rocks and other objects in the epoxy to give the appearance of steam, a river, a lake, or the ocean. At the same time it allows a super flat finish that allows dancing, and all the things normally associated with a flat floor.
Advantages of Clear Table Top Resin #214
Low odor for use in occupied areas
Low viscosity – good wetting properties
Meets USDA standards for use in food handling applications
Glossy finish
Stain resistant
Zero (0) VOC – No VOC means it meets the toughest low VOC standards.
Epoxy.com is proud to announce Product #659. This is a conductive primer that makes our existing conductive epoxy topcoat products even better. Here is summary of the material:
CONDUCTIVE EPOXY PRIMER
Epoxy.com Product #659
DESCRIPTION
Product #659 Conductive Epoxy Primer is a water-based, two component, carbon filled conductive epoxy primer designed for use with various Epoxy.com Conductive Systems.Product #659 has very low odor making it suitable for use in occupied buildings.
ADVANTAGES
For Use with Various Epoxy.com Conductive Systems
Maintains Electrical Conductivity Performance over the Wear Life of the System
Fast Dry Time
Low Odor During Application and Cure
VOC Compliant in all 50 US States, Meets USGBC LEED Requirements
CONSIDERATIONS
Substrate must be above 50°F and relative humidity below 85% for proper curing.
Substrate must be properly prepared following Epoxy.com recommendations and free of dirt, waxes, curing agents and other foreign materials
Excessive moisture in the substrate will require a moisture vapor control treatment like Product #830
Concrete substrate must be insulated with a non-conductive
epoxy primer/base coat like Product #12 Chemical Resistant Epoxy Primer or Product #899 Epoxy Primer prior to application of Product #659 Conductive Epoxy Primer. Consult with Epoxy.com Technical Department for recommendations.
Surface Preparation is the most critical portion of any successful resinous flooring system application. All substrates must be properly prepared and tested for moisture as outlined in installation procedures or as recommended by Epoxy.com.
BATCHING, MIXING & INSTALLATION
Product #659 Conductive Epoxy Primer: PART A 1 quart to
PART B 3 quarts to
Clean Water 8 volume ounces (6% by volume of water)
Total 4.125 quarts
Coverage (250 square feet/gal.) 265.6 square feet per batch
Pre-mix Product #659 Conductive Epoxy Primer part B prior to combining with part A. Mix 1 part A with 3 parts B for 2-3 minutes with a low-speed jiffy mixer, scraping sides and bottom of mix vessel. Continue mixing and add 6% by volume clean potable water and continue mixing for 1 additional minute.
Immediately spread and back roll mixed Product #659 Conductive Epoxy Primer at a rate of 250 ft2 per gallon with a short nap roller over previously applied non-conductive epoxy primer/base coat.Care should be taken to avoid puddles. Allow to cure minimum 12 hours (at 75°F) to maximum 24 hours before coating with specified topcoat.
Important: Test Product #659 Conductive Epoxy Primer with ohm meter prior to top coating to confirm acceptable level of conductivity is achieved. If test readings are higher than 25,000 ohms, contact Epoxy.com Technical Support Department for further instructions before installing specified topcoat.
Clean skin with soap and water. Tools and equipment should be cleaned with warm soapy water, xylene or lacquer thinner. Consult Material Safety Data for safety and health precautions.
COMPOSITION
Waterborne Epoxy Resin and Conductive Filler. Color: Black.
COVERAGE
Product #659 Conductive Epoxy Primer applied at 250 ft2 per gallon yields 2.7 mils dry film thickness.
TECHNICAL DATA (@ 75°F, 50% RH)
Viscosity
500-1000 CPS
Mixing Ratio
1 Part A to 3 Parts B by Volume
Solids Content, by volume
45%, thinned
Volatile Organic Content (VOC)
<10 g/L
Bond Strength to Concrete
300-400+ psi (100% concrete failure)
Shelf Life
6 months when properly stored
CURE/DRY TIME (@ 75°F, 50% RH)
Pot Life
20-30 minutes
Dry to Touch
6-8 hours
Recoat (Refer to testing requirements)
12-24 hours
Light Traffic
24 hours
For more information, visit us on line at Epoxy.com, email me at norm@epoxy.com or call Epoxy.com Technical Support at 352-533-2167.
Industrial and commercial floors take heavy abuse. The older the flooring the worse shape it is in. Conventional wisdom says that such a breakdown of the floor is inevitable. There are steps you can take to protect your floor before it gets damaged. Once the damage has happened there are steps you can take to permanently repair most damaged floors.
Floor joints, are the source of many industrial flooring problems. The purpose of these joints (in original construction) is to give the concrete a controlled place for the concrete crack as it shrinks. They sometimes are called expansion joints. In theory they will expand when the concrete gets hot.Indoors, where temperature is somewhat stable, most of their function of these joints has ended after 28 days or so of concrete. Concrete does most of it shrinking in the first 28 days.
A wheel across an empty Joint
The downside of these joints in the concrete is that it gives a place for the concrete to start chipping away. See the highlighted (in blue) corners in the illustration to the right. When wheels pass across the top it hammers the edge in the opposite side of traffic flow. This breaks off tiny pieces of concrete (again drawn in blue as a triangle at the edges of the concrete joint). The bigger the area chipped out earlier, the bigger and faster additional chipping happens. Time goes on and “pot holes”start to form in the concrete joint in direct proportion to the number of times wheels have hit a given spot.This can become a major trip and forklift hazard.
The best way to prevent this concrete damage is to fill the joints with Epoxy.com – Product #11-100% Solids Flexible Epoxy Joint Filler for Saw Cut Joints. The #11 is semi-flexible so it still allows some joint movement but (unlike caulking) is firm enough to support the hard wheel as it passes over the joint, virtually
Wheel Supported by #11 as it passes over the joint.
eliminating the pounding and chipping effect on the sides of the joint. See in this diagram how the #11 supports the wheel as it passes over the joint.
For application on flat surfaces Epoxy Joint Filler for Saw-Cut Control Joints Product #11 can be poured or pumped from an Epoxy.com Binary Pumping Systems. In areas where cosmetics are important mask both sides of the substrate before applying the material.
If the areas are bigger you can use Epoxy.com Product #12 blended with silica sand to make a mortar to fill the pothole, then re-cut your joint with a concrete saw as shown in the diagram here. The Product #12 can also be mixed with silica sand and used to repair areas in the center of a slab that might have started as a random crack or because of a chemical spill or due to impact damage.
Here is an outline of getting your flooring ready and some of the types of flooring we can offer you.
I can easily calculate how much material you will need for your floor. The patching will take a little more effort and some estimation of the geometry of the repairs from you:
Joints
Fill joints with Epoxy.com Product #11 – epoxy.com/11.aspx.If there is spalling at the joint see “pot hole” repair below.
Still not sure? Email epoxy.com Technical Support info@epoxy.com call us at 352-533-2167. We will help you select the right product for your job. We can also help you estimate how much of it you need, and quote you on those quantities.
You can also visit us at www.epoxy.com 24 hours a day 7 days a week.
Epoxy.com offers many different types of seamless flooring. We offer so many kinds that sometimes it confuses people. The purpose of this article is to explain the differences, and to help you choose the right epoxy seamless flooring system for your application. In some cases the right seamless flooring system will not even be an epoxy. It may be polyurethane or Methyl Methacrylate (MMA).
Epoxy.com Epoxy Chip Flooring on a VT Interstate Rest Area – Taken over 15 years after installation.
Epoxy Floor Coatings
Epoxy coatings can be effective flooring systems. When choosing epoxy as a flooring system choose a 100% solids (zero VOC, hard durable coating. You also want a coating that is available in multiple colors. These floor coatings can last for decades, so you want to pick a color that you like. Properly installed you will be looking at this floor coating for a very long time. This kind of flooring system is available in the following options:
Epoxy.com Product #1 – www.epoxy.com/1.htm – meets all the criteria above. It has good chemical resistance, and excellent cost to benefit ratio. Great for warehouses, in areas with high traffic and only modest chemical exposure.
Epoxy.com Product #1ESD – www.epoxy.com/1esd.aspx. This is the same as product #1 above but has conductive filler in it. Depending on the primer you use under this system it can be conductive (100,000 – 1,000,000) ohms of resistance or Electro-Static Dissipative (ESD) which is 1,000,000 to 1, 000,000,000 ohms. Used in plants that produce explosive materials like ammunition, fireworks, flairs, or explosive solvents, and used in areas of sensitive electronics, like computer server buildings, avionics, electronics assembly and electronic production areas.
Epoxy.com Product #2 – www.epoxy.com/2.aspx. This is similar to product #1 but with a much higher chemical resistance. This major increase in chemical resistance is offset by only a small increase in the cost of the #2 over the Product #1. The product #2 is well suited for applications like garages, machine shops, sewer tank floors, battery rooms, cooling towers, grooming shops, dog kennels and all areas where an economical chemical resistant coating is required.
Epoxy.com Product #633 – www.epoxy.com/633.aspx – is a highly chemically resistant epoxy floor coating and flooring system. Like Product #1 and Product #2 is extremely durable. Product #633 is typically used in areas where containment of aggressive chemical is imperative. For example Product #633 will hold up to continuous exposure of 98% Sulfuric acid for a period of at least 6 months without loss of structural integrity. Great for secondary containment for a large number of chemicals.
All the systems above can go over many different types of substrates with the proper surface preparation. All of the products above are available in 17 colors and can be color matched for an additional cost. The systems above can be combined with various anti-skid materials or broadcast with silica broadcast aggregate to produce a thicker floor.
Chip Floor
Epoxy.com Chip Flooring – www.epoxy.com/chips.aspx – is the perfect blend of economy, durability, low maintenance, and gorgeous appearance. It uses a 100% solids pigmented epoxy base coat, a full broadcast of plastic chips, and two coats of chemical resistant clear glaze. The chemical resistant glaze also makes this easily the most non-yellow epoxy top coat available today. This easy to clean chip flooring system is best for high traffic areas where appearance, durability and low cost of ownership is a must. Chip Flooring is great for commercial and residential kitchens, bathrooms, showers, grooming shops, kennels, veterinary clinics, garage floors, show rooms, rest areas, and much more. This product can be installed with an integral cove base. Epoxy.com Chip Flooring can be installed by a contractor but easy enough to be installed by a home owner. Epoxy.com Chip Flooring can be installed in a residence but is rugged enough to be used in the most demanding commercial applications.
Quartz Flooring
Quartz Flooring Product #15 – www.epoxy.com/15.aspx has a long history of being durable, attractive and non-yellowing. I personally installed this product on high school bathroom floors in the mid 70s. These floors have held up to the test of time with little or no wear, little or no loss of shine and little to no yellowing even under the urinals. This is also available with an integral cove base
Solid Colored Flooring
These solid colored floors are based around self leveling, trowelable or double broadcast application techniques. These floors are sometimes called shop floor. They are made to be thick and extra durable under extremely harsh environments. They can be top coated with any of the systems above under coatings. This kind of flooring is available in 3 speeds of cure: normal, fast, and cold cure. Solid colored flooring is also available with an integral cove base.
Methyl Methacrylate (MMA) Flooring
The big advantage of MMA is speed of curing. Each coat of MMA will cure hard to the touch in 1-2 hours. This allows the next layer to be applied quickly and traffic to be returned to it quickly. You can even build a fast setting integral cove out of MMA resin.
I personally installed MMA on many floors with very tight schedules. One restaurant was only closed for breakfast. The project started with rotten plywood floors. At 10 PM the carpenters came in to work. They removed rotten floor and floor joists. They replaced the floor joists and the plywood. At 5 AM we went in with the flooring installation crew. We primed the floor and sealed up the joints in the wood and the screw holes. At 6:30 AM we laid the floor. At 8 we put a glaze coating on the floor and by 10:30 the restaurant workers were on the floor prepping for lunch. The floor installation from start to traffic took just 5.5 hours.
Polyurethane Decking Systems
Polyurethane Decking – http://www.epoxy.com/elastomeric.aspx – is the system best used in areas where maximum flexibility is necessary. This is typically outdoors, waterproof applications like balconies.
Specialized Flooring
We have a number of systems that are specialized flooring like conductive and ESD (Electrostatic Dissipative) flooring – www.epoxy.com/conductive.aspx – and various hybrid systems. If your project does not seem to fit in the categories above email me at norm@epoxy.com or call us at 352-533-2167.
In conclusion we offer many types of seamless flooring systems, they can be used for commercial and residential applications. These systems are durable, economical, and easy to install even by homeowners. These seamless flooring systems may be made out of epoxy, polyurethane, or methyl Methacrylate (MMA). Seamless flooring systems are available in multicolored or solid colored. They range in chemical resistance from very good to resistant to aggressive chemicals. When in doubt what is right for your project send me an email at norm@epoxy.com or give me a call at 352-533-2167.
“We have a dairy processing and packaging facility that was built circa 1994. At the time of construction we chose to install a flooring system which was vinyl ester based with fiberglass mat. The floor has held up quite well in areas where it had a good bond. The failures we have seen are in areas that covered either an expansion joint or control joint in the concrete. In these areas the flooring has delaminated from the concrete. Where possible we have made a clean cut through the flooring to an area where we had a good bond and left the concrete exposed. Other failure areas are around floor drains. We have made repairs with quick curing epoxies in the past but these don’t seem to bond well to the existing vinyl ester flooring.
“Having a manufacturing facility with only one down day limits our ability to make substantive repairs. During a search for low or no VOC flooring systems I you folks.”
I have personally made many thousands of square feet of floor repairs that sounds exactly like the issues and conditions that you are describing.
Here is what I did to permanently resolve the issue, at least in the patched areas.
Cut back the edges of the delaminated areas back to a point where the vinyl ester is well attached.
” Do you have a formula of epoxy that can be used as a water cleanable epoxy grout for tile installations? If so please provide me a product data sheet.”
Water Cleanable Epoxy Grout and Adhesive With Filler
100% Solids Epoxy and Special Fillers – Water Cleanable – No Portland Cement Content
DESCRIPTION
Epoxy.com Product #225 Water Cleanable Epoxy Tile Grout and Adhesive is a user friendly, water cleanable, 100% solids epoxy grout and adhesive and Filler Powder . Used for grouting ceramic tile, brick pavers, and stone, Epoxy.com Product #225 Water Cleanable Epoxy Tile Grout and Adhesive is supplied in pre-packaged kits containing resin, hardener, and mineral fillers that produce a dense, uniform seal. Typical applications for Epoxy.com Product #225 Water Cleanable Epoxy Tile Grout and Adhesive require resistance to thermal shock, chemicals, and heavy traffic including meat packers, breweries, canneries, bottlers, CIP areas, and pharmaceutical formulators.
ADVANTAGES
User Friendly Packaging
Low Odor for use in Occupied Areas
Meets ANSI A-118.3 Specification for Chemical Resistant, Water Cleanable Epoxy Grout
Available with Cold-Room Hardener
Low Viscosity-good wetting properties
Versatile-for both Setting and Grouting all Types of Tile
USDA Approvable
Available in Floor Grade and in Wall Grade
Zero (0) VOC – No VOC content means it meets the strictest Low VOC requirements
SURFACE PREPARATION
Surface Preparation is the most critical portion of any successful resinous flooring system application. Work must be performed by trained or experienced contractors or maintenance personnel. Epoxy.com service department is pleased to answer any questions. Before grouting, clean joints and the tile surface with a damp sponge to remove dust, dirt, and other contaminants. Do not leave water standing in joints. Do not clean tiles with acid cleaners.
MIXING
Empty entire contents of Epoxy.com Product #225 Water Cleanable Epoxy Tile Grout and Adhesive Part A and Part B into a clean mixing pail. With a slow speed drill or margin trowel, mix until liquids are completely blended. Add at least ¾ of the TILE GROUT FILLER (more for wide joints) and blend until uniform.
CONSIDERATIONS
Substrate must be free of dirt, waxes, curing agents, and other foreign materials
Protect from exposure to chemicals and harsh cleaners until fully cured.
Substrate temperature must be a minimum of 50°F-Contact Epoxy.com for Low Temperature Cure
INSTALLATION
Pour mixed Epoxy.com Product #225 Water Cleanable Epoxy Tile Grout and Adhesive onto working area. Following standard epoxy and grouting techniques, apply to surface. Be sure all grouted joints are completely filled. Remove excess grout with grout float. Do not leave excess grout on face of tiles. For complete installation instructions, contact Epoxy.com Technical Service.
CLEAN UP
Some tiles and pavers can be stained by color pigments in Epoxy.com Product #225 Water Cleanable Epoxy Tile Grout and Adhesive. Try small area to determine results before grouting entire surface.
Clean skin with soap and water. Tools and equipment should be cleaned with xylene or lacquer thinner. Consult Material Safety Data for safety and health precautions.
Composition
Epoxy.com Product #225 Water Cleanable Epoxy Tile Grout and Adhesive is a100% Solids Epoxy Adhesive and Grout Fillers
PERFORMANCE PROPERTIES
Tensile Strength
ASTM C-307
2,000 to 2,500 psi
Compressive Strength
ASTM C-579
15,000 psi
Flexural Strength
ASTM C-580
3,800 to 4,100 psi
Water Absorption
24 hours
0.15%
Heat Resistance
160°F Continuous
230°F Intermittent
Bond Strength to Concrete
ASTM C-321
350-400 psi
CURE/DRY TIME
Working Life
45 minutes
Initial Cure
6-7 hours @ 75°F
Full Set Time
Overnight
Full Cure & Maximum Resistance
5-10 days
MAINTENANCE
After completing the application of Epoxy.com Product #225 Water Cleanable Epoxy Tile Grout and Adhesive, the installer should provide the owner with maintenance instructions. If floors become slippery due to animal fats, oil, grease, or soap film, clean and rinse thoroughly. Epoxy.com Product #225 is easily cleaned with neutral soaps or detergent
COLOR SELECTION
Epoxy.com Product #225 Water Cleanable Epoxy Tile Grout and Adhesive is available in custom colors, subject to laboratory approval, minimum quantity, lead time for production, and increased cost.
Click the picture of color card below for a larger version of this picture of the color chart. Please note: The picture to the right is a photographic reproduction of the color card for this product. The photo reproduction process and your monitor and/or printer will change these colors. This chart is to give you an idea of the colors available and not intended for critical color selections.
Need help figuring out how much Epoxy.com Product #225 Water Cleanable Epoxy Tile Grout and Adhesive you will need. Use the Epoxy.com Product #225 Grout Calculator.
A customer writes: “I installed your Product #1 All Purpose Epoxy Coating on our floor about 20 years ago. The floor is not warn out or pealing. It does have scratches where pallets with nails sticking out the bottom has scratched the surface. I want to change the color to our company color anyway, so I want to re-coat the whole floor. How do I proceed from here?”
You will want to sand the existing floor removing all the shine. It sounds like there was quality installation and surface prep, since you have no lifting or pealing. If you should have any that is loose you need to completely remove loose coating . Solvent wipe with Xylene. Lets solvent dry and apply your epoxy normally.
CAUTION: Epoxy doesn’t like sticking to epoxy unless you do your surface prep meticulously. I always recommend doing a test patch to test your surface preparation before you proceed with doing the rest of the floor. This can be done by placing a small test patch or patches. Let them harden overnight and then try removing them with a putty knife, screw driver of similar method to insure it is well bonded.
For more information please contact Epoxy.com Technical Support Department by email at: info@epoxy.com or by phone 353-533-2167.
A user writes: “I have seen a number of your products that are on a list or marked with a tag that says Zero (0) VOCs. When I look at the data sheet it says that the Epoxy.com product is 100% Solids, but does not say it is Zero (0) VOCs.”
Norm Lambert > Thank you for pointing that out. You bring up an excellent question. Epoxy.com Products that are 100% solids (100% active ingredients) do not contain solvent, that means they have no VOCs making them compliant with the toughest Low VOC Standards. I will start updating pages on the Epoxy.com to reflect that in the future. Until then please rest assured that all Epoxy.com Products that are 100% solids have no VOCs in them.
Product #17 Epoxy Stone Overlay, with mixed stone sizes
It is that time of year again. If you have Epoxy Stone Overlays you know it gives beautiful natural look. The Epoxy Stone Overlay looks like wet shinny rock. It allows water to flow more naturally, giving you additional drainage in areas that you are walking where you feet might get wet if it is raining or near a water source like a pool.
As time goes by your stone will get less shinny. This is not just an esthetic issue. The
Epoxy stone overlays need to be reglazed from time to time. That is true about epoxy stone overlay systems available from us or from anyone else. In some parts of the country in the direct sunlight this could be every year. Other parts of the country with less sun might be 5 or more years. If you wait to long to reseal your stone it will start failing as the bond breaks down between the individual stones. The stones will then start becoming loose. If not resealed soon enough eventially the whole system will fail. Sealing at proper intervals with the right material is the only way to prevent this.
If you don’t want a system you need to maintain, we have other (non rock) systems that require little or no maintanance.
Resealing the Epoxy Stone Overlay.
Product #15 Chemical Resistant Epoxy Floor Resurfacing System is typically used for resealing epoxy bonded stone. Product #15 Chemical Resistant Resurfacing system oxidizes much slower than other epoxies, and usually last much longer than other epoxies used for reglazing epoxied stone pebbles. You don’t want to use other epoxies that oxidize excessively unless you are willing to reglaze 1.5 to 2 times more often than with Product #15.
The Product #15 Epoxy to reseal your stone not only adds shine back but actually reinforces the connections between the stone. Never use acrylic and other sealers commonly sold at big box stores to reseal your stone. These non-epoxy sealers add shine back to the stone, but doesn’t do anything to reinforce the bond between the individual stones. Worse yet unless the single component non-epoxy sealers have totally been warn away, they will act as a bond breaker preventing future epoxy resealing from getting to the surfaces they need to get to, in order to give you your original strenth back.
Bonding stone together with Product #17 – Epoxy Stone Adhesive is attractive and functional. It allows you to have the look of natural rock. This “natural rock” will let water pass through it just like its non-epoxied counterparts. It is however a good choice when you don’t want that stone to be moved, accidentally or on purpose.
This function is so nice that I am seeing projects where larger and larger stone is being utilized for the same reasons (above) as the small stone. There are a few shortcomings that should be avoided when bonding larger stones.
You want to make sure when selecting your stone that it is not too round. Round stone reduces the square inches of surfaces touching each other that are bonded together. That reduces the strength of the material, by reducing the square inches of bonding surface. If angular stone is used (as in the picture above) you increase the surface area touching each other and increase the strength.
If you want larger stones in the mix, I suggest you use a variety of smaller stone to fill in the large gaps between the bigger stone. If you combine a mixed gradation of stone that is also angular (not round) you can get an excellent compromise of strength and large stone beauty.
During my last blog on January 10, 2016 about “Surface Preparation When Installing Concrete” we discussed among other things preparation of concrete by acid etching. I want to revisit that now in a slightly less formal explanation about why it is not the best of the possible methods of doing surface preparation.
Acid etching does not remove most contamination from the concrete. It is necessary before you acid etch concrete to remove most typical type of contamination like oil, grease, paint, mastic, and a host of other things first.
Acid etching attacks the Portland Cement. The Portland cement is the “glue” that is holding your concrete together. So acid etching done incorrectly will do more damage than good. Even if you do it correctly your floor may not be as strong a substrate for epoxy (or anything else) than it would have been if you mechanically cleaned it.
If you are going to acid etch I suggest that you not only do it properly but follow it with abrasive cleaning, to remove the soft top part of your concrete that is damaged by the acid etching. When I was an installer of epoxy products I rarely if ever acid etched but instead did mechanical cleaning.
Here are some of the reasons acid etching may not be desirable for your job.
Acid etching is a risk to safety. Acid can damage items at your jobsite and pose a risk of injury to the people in the area.
Mechanical cleaning is better for the environment, no acid will find its way into the ecosystem.
Mechanical cleaning allows quicker turnaround time, you don’t have to wait overnight for the substrate to dry.
Mechanical cleaning gives you more consistently high quality substrate than acid etching does.
In summary, whenever you can use abrasive cleaning it is safer and better than acid etching.
Surface Preparation Guide
For Concrete, Wood, and Metal Substrates
CONCRETE SUBSTRATES
I. GENERAL INFORMATION
Surface preparation is considered to be the most important step of any resinous flooring application. Improper surface preparation could turn what seems to be a simple process into a lengthy, difficult repair. The following conditions will dictate the type of surface preparation:
A. Concrete Placement
1. Slab-on-grade or on the ground
a. A 10 mil minimum vapor barrier is necessary to prevent moisture vapor transmission. An efficient puncture proof barrier is recommended.
b. Proper jointing will minimize cracking which could transmit through the resinous flooring system.
2. Elevated Slabs
a. Pan construction should be vented.
b. Metal deck construction should be properly jointed to minimize cracking.
B. Curing and Finishing Techniques
1. Curing compounds, if used, must be mechanically removed from the concrete surface prior to all resinous flooring applications.
2. Recommended techniques:
a. Wet cure
b. Light steel trowel finish to minimize laitance and provide hard
surface
C. Age of Concrete
Concrete must be a minimum of 28 days old for resinous flooring applications. Primers are now available which can be used on fresh (green) concrete on some installations. Contact the technical department for details.
D. Previous Contamination can affect the bond of the resinous flooring and must be removed. Types of contamination are:
1. Oil, grease, or food fats can usually be burned off with a flame gun or removed with a commercial degreasing compound or solvent. Epoxy.com Product #201 Oil Stop Primer is an important tool in dealing with petroleum oil contaminated concrete.
2. Curing compounds, sealers, and other laitance are best removed mechanically with:
a. vacuum shot-blasting
b. scarifying
c. sand blasting
E. Present Condition
1. Test for moisture: Coating system bond failures on slabs on grade and elevated/lightweight concrete caused by moisture vapor transmission are the industry’s largest single problem and result in extreme frustration from owners, clients, and contractors. Epoxy.com recommends testing for moisture vapor transmission. The recognized methods are:
a. ASTM-F-1869 Standard Test Method for Measuring Moisture Vapor Emission Rate of Concrete Subfloor Using Anhydrous Calcium Chloride: The maximum allowed water/vapor transmission rate is 3 pounds per 1,000 square feet per 24 hours.
b. ASTM F-2170 Standard Test Method for Determining Relative Humidity in Concrete Floor Slabs Using In Situ Probes: This test measures the relative humidity in the slab below the surface. If taken over a period of time, it will show the rate of drying in the slab. The maximum relative humidity should be below 80%.
c. ASTM-D-4263 Plastic Sheet Test: This test gives an indication that moisture may be present.
2. Moisture related failures can be prevented through:
a. Placing new concrete over an efficient vapor barrier.
b. Testing for moisture vapor transmission as prescribed above prior to resinous flooring application.
c. Applying a moisture vapor transmission reduction system where moisture content is too high for successful resinous flooring applications. See Epoxy.com Product #830 Moisture Vapor Treatment for more details
3. A clean surface is necessary to establish a strong bond between the resinous flooring and concrete.
4. Resinous flooring systems are only as sound as the concrete they areapplied to. All unsound concrete should be repaired or replaced prior to resinous flooring applications. Consult your Epoxy.com Technical Service Department for specific information.
5. Resinous flooring materials should be applied to level concrete substrates. Grind or fill high and low spots prior to application.
6. Repair cracks prior to resinous flooring applications
F. Mechanical Prep vs. Acid Etching
Resinous flooring materials ideally bond to concrete with a rough, sand-paper finish. This finish can be achieved by either acid etching or mechanical methods. The choice of preparation is dictated by the factors above. Other factors which determine the type of preparation include:
1. Ecological restrictions involved with waste removal which could prohibit the use of acid etching and other chemical methods.
2. The type of resinous flooring material: It is recommended that concrete floors be acid etched prior to application of polyester and vinyl ester flooring systems.
G. Acid Etching
The following steps are recommended for acid etching:
1. Dilute commercial muriatic acid with water using 1 part acid by volume to 3 parts clean water by volume. Add the acid slowly taking care to avoid splashing. Workers should be protected with safety glasses, rubber gloves, and boots. If skin or eye contact occurs, rinse affected area thoroughly with clean water and follow Material Safety Data recommendations.
2. Sprinkle acid solution onto the entire surface in order to allow the acid to reach all areas of the concrete. Adequate coverage is
approximately 75 ft²/gallon of acid/water solution. Do not puddle and spread.
3. Scrub the acid solution into the concrete using a stiff bristle broom to remove loose concrete and laitancy.
4. Before rinsing, look for areas where bubbling did not occur. These areas have not been sufficiently cleaned and will require mechanical scarifying and additional acid etching.
5. When the acid solution has stopped bubbling (usually after approximately 15 minutes), rinse the floor thoroughly with water. Do not allow the floor to dry before rinsing because the salts formed by the acid reaction may cause problems with the adhesion and performance of the resinous flooring system. Test pH of the concrete surface to verify that the concrete tests alkaline.
6. Finally, the floor should be dry mopped to remove standing water and dirt remaining after the acid etching. Allow the floor to completely dry prior to the application of any resinous flooring system. Failures can occur in resinous flooring system applications due to moisture remaining
in the substrate.
H. Mechanical Preparation
Contamination and other foreign materials must be mechanically removed to ensure a satisfactory bond. All dust and debris must be thoroughly removed.
II. OLD CONCRETE
Old concrete surfaces must be structurally sound. Any unsound areas mustbe repaired prior to proceeding with the resinous installation. For
proper patching and repairing, use Epoxy.com Technical Service
Department. Remove existing paint, scale and loose concrete by rough
sanding, sandblasting, shot blasting, or grinding. In some cases where
plant conditions allow, a stripper may be used to remove excessive
build-up of paints or sealers.
Structurally sound concrete should be mechanically prepared to remove any contamination. Vacuum shot blasting is the best method for achieving
a good profile for bonding and should be used where possible. Before
installation of any Epoxy.com Product the surface must be examined for moisture vapor transmission using:
ASTM-F-1869 Standard Test Method for Measuring Moisture Vapor Emission Rate of Concrete Subfloor Using Anhydrous Calcium Chloride.
ASTM-F-2170 Standard Test Method for Determining Relative Humidity in Concrete Floor Slabs Using In Situ Probes.
ASTM-D-4263 Standard Test Method for Indicating Moisture in Concrete by the Plastic Sheet Method. This test is only an indication and should not
be used to determine moisture migration.
Other ASTM Tests which are applicable to concrete preparation are:
ASTM-D-4258 Standard Practice for Surface Cleaning Concrete for Coating
ASTM-D-4259 Standard Practice for Abrading Concrete
ASTM-D-4260 Standard Practice for Acid Etching Concrete
ASTM-D-4261 Standard Practice for Surface Cleaning Concrete Unit Masonry for Coating
ASTM-D-4262 Standard Test Method for Ph of Chemically Cleaned or Etched Concrete Surfaces
ASTM-C-811 Standard Practice for Surface Preparation of Concrete for Application of Chemical Resistant Resin Monolithic Surfacing
III. NEW CONCRETE
New concrete must be well cured and dry prior to coating. Allow to cure a minimum of 28 days unless using green concrete primer. No curing
agents or sealing compounds should be used at any time prior to coating. A light steel trowel finish is recommended when finishing the concrete surface.
Any oil, grease, laitance, or other foreign material must be removed. Steam clean with a strong degreaser such as tri-sodium phosphate. Laitance and other foreign material are best removed by mechanical
methods such as vacuum blasting, scarification, or grinding.
All new concrete can be acid etched or mechanically prepared by vacuum shotblasting, sand blasting, scarifying, or grinding. Vacuum shot-blasting provides the cleanest environmentally safe area during
cleaning. It also provides a mechanically rough surface to achieve a
good bond.
When acid etching, use a 3 to 1 dilution of water to acid and follow directions printed above.
Before the installation of any Epoxy.com resinous system, the surface should be examined for moisture. Test for moisture vapor transmission using ASTM F-1869 Standard Test Method for Measuring Moisture Vapor Emission Rate of Concrete Subfloor Using Anhydrous Calcium Chloride. The maximum allowable rate is 3 pounds per 1,000 square feet per 24 hours.
Another procedure that helps determine slab dryness is ASTM-F-2170 Standard Test Method for Determining Relative Humidity in Concrete Floor Slabs Using In Situ Probes. Maximum allowable R.H. for protimeter test is 80%.
WOOD SUBSTRATES
I. GENERAL INFORMATION
Resinous flooring must always be applied directly to exterior grade plywood with extended glue line INTERIOR GRADE PLYWOOD delaminates easily and SHOULD NOT BE USED as it could result in a failure of the resinous flooring system. MARINE GRADE PLYWOOD contains moisture repellants which could cause a darkening of the resinous flooring system and SHOULD NOT BE USED. All plywood must be completely free of all waxes, varnishes, or other foreign materials.
A. Plywood used to cover existing wood floors
1. Clean and fasten existing wood floor to the floor joists.
2. If the floor is completely sound, fasten ½ Exterior grade plywood “C” plugged with an exterior glue line to the existing floor. Stagger the plywood for strength.
3. ¾” DFPA Exterior or ¾” DFPA Underlayment grade plywood with exterior glue line must be used if the existing floor cannot be cleaned, or is not sound.
4. All plywood must be completely free of all waxes, varnishes, or other foreign materials.
5. Secure plywood with exterior glue.
6. Use Ring Shank or Wood Screws at six (6) inch centers around panel edges and support.
7. Stagger all panel joints, fill joints with epoxy filler, and coverjoints with fiberglass cloth and epoxy resin.
8. Lightly sand the floor surface to insure proper adhesion of the resinous flooring system.
9. Seal all joints and fastener head holes with Epoxy.com Product #2005 – Semi-Flexible Epoxy Gel Adhesive.
10. Prime surface with appropriate primer prior to system application. Surface may require double priming due to porosity of plywood.
B. Plywood used for new construction (plywood is laid directly on the joist)
1. Exterior grade plywood “C” plugged with an extended glue linemust be used.
All plywood must be completely free of all waxes, varnishes, or other
foreign materials.
2. Use Ring Shank or Wood Screws at six (6) inch centers around panel edges and support.
3. Stagger all panel joints, fill joints with Epoxy.com Epoxy.com Product #2005 For outdoor applications cover joints with fiberglass
cloth and the membrane system being used with the outdoor system.
4. Lightly sand the floor surface to insure proper adhesion of the resinous flooring system.
5. Remove all dust with a vacuum cleaner.
C. Applications with waterproofing:
1. After preparing the floor surface as prescribed above, caulk all joints with Epoxy.com Product #2005 for indoor systems. For outdoor systems use the membrane used with the Epoxy.com outdoor system.
2. Apply the waterproofing membrane as specified.
METAL SUBSTRATES
I. Preliminary Preparation
A. Metal substrates must be structurally sound prior to any resinous system being applied. For best results Sandblast to Commercial Blast (SSPC10 / NACE3) for non-immersion applications and Sandblast to near white metal -(SSPC10 / NACE2) for immersion applications.
B. Remove all foreign materials such as oil and grease with solvents or other degreasing compounds.
C. All scaling and rust must also be removed mechanically by sanding, sandblasting, or abrasion.
II. Treat the blasted/abraded surface with a phosphoric acid solution as
described below in order to prevent rust formation if the surface is
left exposed for some time prior to application of the resin system.
A. Always use a 10% solution of Phosphoric Acid.
B. Mix acid solution in either glass, plastic, or earthen containers (never use metal containers), by adding Phosphoric Acid to water. NEVER VICE-VERSA due to heating or splashing which may occur.
Workers should be protected with safety glasses, rubber gloves, and boots. If skin or eye contact occurs, rinse affected area thoroughly with clean water and follow Material Safety Data recommendations.
C. Apply phosphoric acid solution by either paint brush or rubber squeegee and allow metal surface to AIR DRY.
DO NOT FLUSH METAL SURFACE WITH WATER.
III. Protect surface from contamination until the primer is applied.
IV. Wipe metal surface with MEK solvent immediately before primer
application.
Additional Useful Information for Installing Epoxy
I have seen tiles that have been prepared in the lab environment that have epoxy well bonded to it. Doing it in under laboratory conditions and doing it in the field is two different things. In all the over 35 years I have been in the business I cannot point you at a single success story where epoxy was installed over tile.
My company started off as an installation company about 35 years ago. When we were a young installation company we made build a sizable business by going around behind all of our competitors that were installing epoxy over tile, and redoing their failed work. That is why I typically I recommend against going over ceramic tile with epoxy.
Surface Preparation Requirements
Bonding to tile requires either intense physical abrasion like sandblasting or etching with phosphoric acid to remove the glaze. If you etch with acid it usually eats up the grout. Acid may, and more likely than not will, get under the tile and loosen it.
The heat and vibration of the sandblasting tends to loosen tile. Sandblasting will damage the grout. Best case situation the tile will require regrouting.
After all that, a single tile comes loose, or a single piece of old grout comes loose, and you have failed your objective.
Alternatives
Many people like the looks of tile. They don’t like the way tile grout leaks and is hard to maintain. For them I recommend that you remove the grout and regrout it with Epoxy.com Product #225 – www.epoxy.com/225.aspx. Product #225 is a 100% solids water cleanable epoxy that is waterproof grout. This eliminates most leaks and grout maintenance issues.
Thos of you that don’t like the looks of the tile, I recommend removing the tile. Get down to a sound substrate. And then proceed. – www.epoxy.com/surfaceprep.htm.
Apply Epoxy.com Product #1W – www.epoxy.com/1W.aspx to the walls. Product #1W is a 100% solids waterproof coating that leaves a ceramic like finish. Product #1W applies much easier than most 100% solids epoxy. It has superior durability and abrasion resistance.
For floors (after the tile is removed) I would level with Epoxy.com Product #12 mortar – www.epoxy.com/12.aspx and then install Epoxy.com Chip Flooring – www.epoxy.com/chips.aspx. Heavy traffic on floors often makes the use of decorative flooring products impossible. Product #315 Seamless Polymeric Multi-Colored Flake Chip Floor Resurfacing System makes this possible. The #315 Chip System creates a beautiful, durable, and affordable floor that is easy to apply by both professionals and do-it-yourself enthusiasts.
For more information on this subject please visit our website at www.epoxy.com or contact Epoxy.com Technical Support at 352-533-2167 or email me – norm@epoxy.com
My company has many different products and systems. I often get asked, “What is the best epoxy?” I need details about the
Clear Chemical Resistant Epoxy #15 over Stained concrete
job to answer that question. The best epoxy is the one that is right for the specific job. That is where our company’s motto “The Right Product for the Right Job” came from. This is the driving force of our company and our technical support department. This has been our driving force for 35 years.
Perhaps the real question is, “What is the most versatile epoxy?” That is an easier question to answer. It is Epoxy.com Product #15 – www.epoxy.com/15.aspx. When I was an epoxy installer I always had Product #15 Clear Chemical Resistant Epoxy Resin on my jobsite.
Advantages
Clear Chemical Resistant
Can be applied as thin as 5/1000 inch or less and as thick as 1/32 (without Filler) or more
Can be applied as an aggregate filled system at a thickness of 12 inches or more.
Excellent wetting properties
Good temperature resistance
Low Viscosity
Non-shrink
Slower than other clear epoxies to oxidize outdoor in direct sunlight
Strong and durable
Virtually non-yellowing indoors
Uses
Acid Stain Concrete Floor Sealer
Base Coving Material for seamless flooring (when mixed with fumed silica and silica sand)
Clear coating over most porous materials
Chemical resistant primer
Chemical resistant mortar when mixed with silica sand
Chemical resistant top coating
Clear epoxy sealer for concrete
Clear epoxy sealer for wood, and other porous materials
Counter top coating
Epoxy quartz flooring
Pothole repair in concrete (when mixed with silica sand)
Sealing of stone that has been previously epoxied together (aka epoxy-rock, stone carpet etc.)
Surface sealing concrete cracks and joints (when mixed with fumed silica thickener)
Use with fiberglass or Kevlar to make strong composite members
Waterproof wood joint sealer (when mixed with fumed silica thickener)
Wood bonding as neat material or mixed with fumed silica thickener
Wood Floor Coating
Product #15 – www.epoxy.com/15.aspx – is a great product to have around for any number of emergency situations. Please address your questions to Epoxy.com Technical Support at 352-533-2167 or email me at norm@epoxy.com.
Mechanical Room Floors are very unique in their use and conditions. You have to consider the installation environment and the function of the floor. Our Mechanical Room Floor will protect the concrete, and contain any liquids that spill.
Systems used in mechanical rooms should be zero VOC. You do not want solvent evaporating from your material. Evaporated solvent could be picked up by your air handling unit sending it through your building. The best way to prevent this is with a VOC free 100% solids resin system. A resin system that is 100% solids has no solvent (or water) in it. It also means when you spread a gallon of material on your floor after it hardens you still have a gallon of material. With water-based and solvent based materials you lose half the material to evaporation.
Mechanical rooms should be chemical resistant. Typically they are top coated with Epoxy.com Product #2 Chemical Resistant Epoxy –www.epoxy.com/2.aspx. If it is a chemical feed room you can supply a list of chemicals and concentrations to the technical support department so you can make sure the #2 is chemical resistant enough.
The systems used for mechanical rooms are impact resistant. The limiting factor is the strength of the concrete substrate. Properly installed the epoxy will stay bonded to the concrete. The only way the epoxy can chip is if you chip the concrete from underneath the epoxy. You can install a thicker epoxy floor for an additional cost if you think you need still additional protection.
The systems recommend for mechanical rooms are highly abrasion resistant and will easily handle traffic up to heavy fork lift traffic. The system can be made even thicker if you have an unusual amount of abusive traffic.
When the mechanical room is over a finished space, it is suggested that a crack isolation membrane be integrated into the system. This can be done with Product #32 Epoxy Membrane System. The advantage of #32 Epoxy Membrane Resin as part of the system is 100% solids and has zero VOCs.
If the mechanical room is shut down and you can handle solvent and want something still more flexible you can use Epoxy.com Product #459 a two component, high solids, elastomeric urethaneinstead of or in addition to the Product #32 Epoxy Membrane above. Product #459 exhibits excellent elongation properties along with high tensile strength and tear resistance to make it an ideal crack resistant membrane for use under Product #2 and all of our other epoxy mechanical room floor coatings.
One of the primary reasons you need a mechanical room floor over finished space below is to waterproof it. The above methods accomplish the waterproofing in the center of the floor. The edges of the floor can be protective with a coving material up the wall and around pipe penetrations. That can be accomplished with Product #720 Epoxy Coving Resin System which can be used to install an integral cove base for all of our epoxy based mechanical room flooring and most of our other epoxy flooring and coating systems. This provides seamless wall to floor protection.
For more information on seamless water and chemical resistant mechanical room flooring, contact Epoxy.com Technical Support Department at 352-533-2167, or email me at norm@epoxy.com.
The problem with getting superior adhesion to difficult to bond to surfaces like stainless steel and aluminum has been solved
The Technical Support Department here gets many calls from people needing help in selecting the right coatings for a variety of metals and difficult to bond to surfaces. Carbon steel is easy to bond to when it is well sandblasted and you use one of our high end epoxy coatings like Product #2 Chemical Resistant Epoxy. What if the carbon steel cannot be sandblasted and can only be ground? What about stainless steel and other difficult to bond to metals and coatings? Epoxy.com Product #660 Universal Primer and Finish was designed to solve these bonding issues.
Product #660 Universal Primer and Finish is a one component, moisture cured polyurethane aluminum filled primer and coating. Product #660 Universal Primer has a low viscosity, with high “wetting” characteristics, and blistering resistance. This makes Product #660 Universal Primer and Finish a superior primer. It can also be used as a finish coat. Epoxy.com Product #660 Universal Primer and Finish undergoes a rapid molecular weight change as it polymerizes into a high molecular weight finish with excellent corrosion and abrasion resistance.
Epoxy.com Product #660 Universal Primer and Finish is an ideal barrier coat when upgrading existing finishes to strong urethanes, coal tar epoxy, etc. The low solvency power of Epoxy.com Product #660 Universal Primer and Finish enables it to be applied over most types of coatings without causing lifting. A test sample should be made to confirm adhesion. Most generic types of chemical or conventional coatings may be applied over Epoxy.com Product #660 Universal Primer and Finish with excellent adhesion.
Advantages
Excellent primer for all types of surfaces.
Superior “wetting out” properties over sound, rusty steel.
Can be recoated in 1 to 2 hours and can be top coated with most generic type coatings.
Cures down to 25 degrees F on dry surfaces.
Service Temperature up to 400 degrees F
Corrosion resistant: Passes 12,000 hours in salt cabinet.
Good weather resistance.
Now with Epoxy.com Product #660 Universal Primer you can bond to well sanded (ground) stainless steel, aluminum, and carbon steel that cannot be sandblasted. Product #660 Universal Primer is also effective in bonding to other difficult to bond to metals and many other hard to bond to coatings.
Product #660 can apply 2 coats and use it as a standalone coating. You can apply any of our 100% solids high quality epoxies or vinyl esters over it. The problem with getting superior adhesion to difficult to bond to surfaces like stainless steel has been solved.
Please contact Epoxy.com Technical Support Department at 352-533-2167 with your questions. Epoxy.com Technical Support is dedicated to making sure you have the right product for the right job.
We are pleased to announce our new easy to navigate links on http://www.epoxy.com/. Thanks to our loyal customer’s feedback we have upgraded our website to make it easier to find products, installation techniques and important documents for your needs.
Our website at http://www.Epoxy.com has been upgraded at the top of the page to read more like a book. Making it user friendly for all. Whether you are an existing customer looking for a product that you are already using or a new visitor to our website looking for ideas to start your projects, we have made it easier for you to navigate.
Existing customers still have access to our catalogue of products by clicking the Products Catalogue link directly after our Home Page link. If you are new to our website or if you have a new project idea or customers looking for something you have not done previously we have links with drop down boxes to assist you in finding the Right Products for the Right Job.
We have added quick links at the top of any page that shows up as an error. You can now type in a saved page directly and if you miss part of the page address or are not 100% certain of the destination, you will still be directed towards our top of the page links for you to navigate through our website.
Our website is customer recommended, updated, and we appreciate your feedback. If you see anything that would help you navigate our website better www.epoxy.com please contact Norm at 352-533-2167. We appreciate your feedback and are thankful for your suggestions.
As always you can contact our technical service department at 352-533-2167 for assistance as we still strongly believe in the human interface. Our customer service department is open Monday – Friday 9-4 ET for your orders and will be happy to help you.
This is the second half of a 2 part of a series on basement waterproofing with epoxy. In Part 1, we discussed waterproofing block wall foundations with epoxy. In Part 2A we discuss how to identify leaks that need waterproofing in basement walls, and floors that are made out of poured concrete. In this part (2B) will deal with epoxy injection repairs of cracks in poured concrete, that cause the leaks.
Earlier we discussed how many homes and businesses experience leaky basements year after year. The worse time is in the spring and after heavy rain. We discussed prudent things that you can do to improve drainage against your foundation. Epoxy Injection is designed to waterproof and give you the concrete’s structural integrity back.
Why Epoxy Inject the Cracks?
We discussed in our last article that cracking is a sign of failure caused by stresses, inadequate design, improper curing, etc. One of the dangers of a structural crack is the effect that it has on the reinforcing bar. The reinforcing represents one of the main structural values of the concrete. Cracks left unprepared allow water to enter your basement and attack the rebar.
Epoxy injection resin has two purposes:
It effectively seals the crack to prevent the damaging moisture entry. Second, it monolithically welds the structure together.
The injection also stops the infiltration of water into your basement.
Epoxy Injection Port Setting
Clean the concrete on both sides of the crack being careful not to force concrete dust into the crack. Concrete dust can be detrimental to the injection processes in several ways. Vacuum the area completely with a shop vac.
You need to determine the spacing of ports to be set. The spacing is a factor of the tightness of the crack and the depth of the concrete substrate. Spacing is normally between four (4) and eight (8) inches.
Port Setting and Sealing
Align ports directly over cracks. That allows injection resin to flow into the crack. Seal surface cracks and the ports in place. Sealing the exterior of cracks is done with Epoxy Gel #2006.
Selecting the Right Epoxy Injection Resin
Epoxy injection resin should typically be low viscosity injection resin- Epoxy Injection Resin #301. It must be low viscosity resin so it will flow in the smallest hair line cracks. Resin can travel several feet from the point of injection. It may take some time before reaching the next port or penetrating through pin holes in the surface. Epoxy injection effectively fills cracks including small voids and hairline cracks
Pumping Epoxy Injection Resin
The most economical way to deliver the epoxy injection is with the 450 ml binary injection system, a manual gun, or the pneumatically driven one. This uses a binary caulking gun with static mix tubes to inject the resin, insuring continuously mixed fresh material.
Limit pressure, low pressures allow gradual resin flow into the crack for deeper penetration. Start injection at the lowest point, and continues upward on the crack area. While injecting the lowest port, resin will flow to and out of the next higher port.
When pure resin is flowing out the next port cap, plug the current injection port and move to the next port. Then injection continues in the port showing resin flow. This procedure continues until all ports are full.
CONCLUSION
Epoxy injection is very effective at repairing concrete cracks and cutting of water infiltration. The right resin and equipment is critical. Epoxy injection makes a crack watertight while restoring the original structural integrity intended for the concrete. You can get all of the material you need to do this by contacting us:
321-206-1833 Customer Service – Ordering and Order Status
Katey Fontaine, VP – Customer Service Director sales@epoxy.com
Technical Support
352-533-2167 Norm Lambert, President
Technical Support Director info@epoxy.com
This is number 2A of a 2 part series on basement repairs. In Part 1, we discussed waterproofing block wall foundations. In Part 2A shows how to identify leaks that need waterproofing in basement walls, and floors that are made out of poured concrete. Part 2B will deal with the actual repairs to poured concrete leaks.
In our last piece we discussed how many homes and businesses experience leaky basements year after year. The worse time is in the spring after winter accumulation of snow. There are a number of prudent things that you can do to improve drainage against your foundation like roof gutters, grading and improvement of drainage. The recommendations here do not replace that conventional wisdom. It is designed to augment and improve upon these conventional methods.
Identifying the Source of the Basement Water Leak
The nice thing about poured concrete is that it holds water back very well. The leak typically happens at a cold joint or in a crack or hole in the concrete.
Concrete Cold Joints
Fresh (plastic) concrete doesn’t bond to hardened concrete. The exception is when a special epoxy bonding agent like Epoxy.com Product #2007 – is used (this bonding agent will be discussed in a future article). When concrete has hardened or has started to harden and you pour more concrete against it (without the right bonding agent) you get what is called a cold joint. These cold joints are a common source of water leaks.
Virtually all basements are built with a giant cold joint – the cold joint between the floor and the wall. Typically there is some sort of water-stops material installed in these joints intended to stop leaking at this cold joint. These water-stops can fail. So the wall to floor joint in a concrete basement is a frequent source of water leaks.
You can also get cold joints in the middle of concrete walls and floors due to multiple pours. You can get cold joints if concrete is setting to fast and fresh concrete is poured against semi cured concrete. Sometimes saw cuts in the floor can be a source of leaks
Form Ties
Then there are the ties that go through the concrete to hold the forms together on either side during the pour. If these form ties are not installed perfectly or if the concrete is not totally vibrated around them, these ties can act as a conduit to let the water in.
Wall and Floor Cracks
When concrete cures it shrinks that is called “plastic shrinkage”. That plastic shrinkage can and usually does result in the concrete cracking. These cracks are one of the easiest ways for water to get into your basement. If the water makes it to the fill side of the tank (under the floor or against the wall) it will typically leak out into your basement. You should look carefully for these cracks when looking for potential leaks into your basement. If you are able to investigate into the water infiltration into your basement when it is leaking it will be easy to see. If trying to find the source of leaks when the basement is dry you have to look for water marks on either side of the cracks and beneath the areas that might be leaking.
Repairing the Basement Leaks with Epoxy
In the next installment on this topic, I will deal with how you waterproof the cracks while structurally repairing them with epoxy and similar materials.
Many homes and businesses experience leaky basements year after year. The worse time is in the spring after winter accumulation of snow. There are a number of prudent things that you can do to improve drainage against your foundation like roof gutters, grading and improvement of drainage. The recommendations here do not replace that conventional wisdom. It is designed to augment and improve upon these conventional methods.
The following article will be 1 of 2. This one deals with Block wall foundations. The next one will deal with poured wall foundations.
Waterproofing Block Wall Foundations with Epoxy
One of the nicest features of most of our epoxies are that they are virtually 100% waterproof. Water simply cannot pass through a good healthy layer of properly applied concrete, block, wood etc. Epoxy also has an incredible bond to concrete, cement, wood and many other construction materials. The bond strength of epoxy to concrete and cement is greater than the tensile strength of the concrete. That means on properly prepared concrete, epoxy cannot be removed without pulling concrete with it. The same is true about wood.
Considerations in Waterproofing with Epoxy
All this gives you the perfect combination to make a block wall watertight. There are limitations however:
In an ideal world the epoxy should be applied on the positive pressure side of the wall, the outside. This way the pressure of the water is pushing it into the wall. That helps to mitigate the likelihood that you get so much pressure on the concrete block that you fracture the block. Typically by the time you know you have a leak you are already backfilled and landscaped so 95% of the time it is not practical to do on the outside of the wall. So you do it on the inside instead.
Water exerts a pressure of less than ½ psi per foot of water depth and most basement walls are only 8 foot high, so you would typically only see 4 psi. So it is unlikely that you have a pressure greater than the tensile strength of the block. So doing it on the inside is typically the only economical alternative.
The Product #1W Epoxy is much more flexible than the concrete block and mortar, but if the mortar or concrete gets any significant cracks in it, it will crack through the coating. On the other hand, the system is very easy to patch if it does crack. We also make a wall grade version of our crack isolation membrane Epoxy.com Product #32 – www.epoxy.com/32.htm – which can reduce the potential for small cracks (which are the most common).
Installation of Epoxy Waterproofing on Block Walls
Once the wall is clean, you need to point-up (fill) any cracks, bad mortar joints, and larger holes that are in the block. Some people use conventional mortar and wait 28 days for it to cure as per the American Concrete Institute. This is a very inexpensive way to do it, but can be affective if done properly. A more effective way to insure the right results is the use of Product #2005 Epoxy Gel Adhesive – www.epoxy.com/2005.aspx. That insures that you have a tight bond over the cracked areas and have already produced a tight waterproof seal in that area. Also the #2005 Gel Epoxy is semi flexible and allows more movement before cracking that conventional grout. The #2005 allows your coating to be installed the day after the #2005 is applied.
Once the cracks and holes are repaired, much of your work is done. You simply apply 1 coat of Epoxy.com Product #899 – www.epoxy.com/899.aspx – Epoxy Primer and allow to dry overnight.
After the primer has cured overnight you can apply the optional crack isolation membrane Product #32W – Wall Grade, or proceed to the coating below. If you do apply the crack isolation membrane 2 coats of the membrane are best. One advantage of the two coats of membrane is that typically you can reduce the number of coats of top coating that is required to seal the block. As you put on the membrane be sure to check to see that the holes in the block are being filled as you go.
Depending on the porosity of your concrete and if you used the crack isolation membrane above you will want to apply 2-4 coats of 1W epoxy wall coating. As you put on each coat check to see that the holes in the block wall are being filled.
Summary of Waterproofing Basement Walls with Epoxy
In conclusion: Leaking basements are a major problem to many structures in the spring. The easiest time to repair them is during the winter when there is little or no leakage. Epoxy.com epoxy coating systems can affectively and economically solve most basement leaking problems. The final product is a hard attractive ceramic like finish that does not require additional painting or other finishes over it.
Next Issue: Waterproofing Poured Wall foundations with Epoxy.
Additional Information on Epoxy Coatings
Product #1W (Wall Grade) Epoxy Wall Coating – a general purpose epoxy wall coating
Epoxy.com offers many different types of seamless flooring. We offer so many kinds that sometimes it confuses people. The purpose of this article is to explain the differences, and to help you choose the right epoxy seamless flooring system for your application. In some cases the right seamless flooring system will not even be an epoxy. It may be polyurethane or Methyl Methacrylate (MMA).
Epoxy.com Epoxy Chip Flooring on a VT Interstate Rest Area – Taken over 15 years after installation.
Epoxy Floor Coatings
Epoxy coatings can be effective flooring systems. Using Epoxy as a flooring system you need a 100% solids, zero voc, hard durable coating. You also want a coating that is available in multiple colors. These floor coatings can last for decades, so you want to pick a color that you like. Properly installed you will be looking at this floor coating for a very long time. This kind of flooring system is available in the following options:
Epoxy.com Product #1 – www.epoxy.com/1.htm – meets all the criteria above. It has good chemical resistance, and excellent cost to benefit ratio. Great for warehouses, in areas with high traffic and only modest chemical exposure.
Epoxy.com Product #1ESD – www.epoxy.com/1esd.aspx. This is the same as product #1 above but has conductive filler in it. Depending on the primer you use under this system it can be conductive (100,000 – 1,000,000) ohms of resistance or Electro-Static Dissipative (ESD) which is 1,000,000 to 1, 000,000,000 ohms. Used in plants that produce explosive materials like ammunition, fireworks, flairs, or explosive solvents, and used in areas of sensitive electronics, like computer server buildings, avionics, electronics assembly and electronic production areas.
Epoxy.com Product #2 – www.epoxy.com/2.aspx. This is similar to product #1 but with a much higher chemical resistance. This major increase in chemical resistance is offset by only a small increase in the cost of the #2 over the Product #1. The product #2 is well suited for applications like garages, machine shops, sewer tank floors, battery rooms, cooling towers, grooming shops, dog kennels and all areas where an economical chemical resistant coating is required.
Epoxy.com Product #633 – www.epoxy.com/633.aspx – is a highly chemically resistant epoxy floor coating and flooring system. Like Product #1 and Product #2 is extremely durable. Product #633 is typically used in areas where containment of aggressive chemical is imperative. For example Product #633 will hold up to continuous exposure of 98% Sulfuric acid for a period of at least 6 months without loss of structural integrity. Great for secondary containment for a large number of chemicals.
All the systems above can go over many different types of substrates with the proper surface preparation. All of the products above are available in 17 colors and can be color matched for an additional cost. The systems above can be combined with various anti-skid materials or broadcast with silica broadcast aggregate to produce a thicker floor
Chip Floor
Epoxy.com Chip Flooring – www.epoxy.com/chips.aspx – is the perfect blend of economy, durability, low maintenance, and gorgeous appearance. It uses a 100% solids pigmented epoxy base coat, a full broadcast of plastic chips, and two coats of chemical resistant clear glaze. The chemical resistant glaze also makes this easily the most non-yellow epoxy top coat available today. This easy to clean chip flooring system is best for high traffic areas where appearance, durability and low cost of ownership is a must. Great for commercial and residential kitchens, bathrooms, showers, grooming shops, kennels, veterinary clinics, garage floors, show rooms, rest areas, and much more. This product can be installed with an integral cove base. Epoxy.com Chip Flooring can be installed by a contractor but easy enough to be installed by a home owner. Epoxy.com Chip Flooring can be installed in a residence but is rugged enough to be used in the most demanding commercial applications.
Quartz Flooring
Quartz Flooring Product #15 – www.epoxy.com/15.aspx has a long history of being durable, attractive and non-yellowing. I personally installed this product on high school bathroom floors in the mid 70s. These floors have held up to the test of time with little or no wear, little or no loss of shine and little to no yellowing even under the urinals. This is also available with an integral cove base
Solid Colored Flooring
These solid colored floors are based around self leveling, trowelable or double broadcast application techniques. These floors are sometimes called shop floor. They are made to be thick and extra durable under extremely harsh environments. They can be top coated with any of the systems above under coatings. This kind of flooring is available in 3 speeds of cure: normal, fast, and cold cure. Solid colored flooring is also available with an integral cove base.
Methyl Methacrylate (MMA) Flooring
The big advantage of MMA is speed of curing. Each coat of MMA will cure hard to the touch in 1-2 hours. This allows the next layer to be applied quickly and traffic to be returned to it quickly. You can even build a fast setting integral cove out of MMA resin.
I personally installed MMA on one kitchen floor with a very tight schedule. The restaurant was only closed for breakfast. The project started with rotten plywood floors. At 10 PM the carpenters came in to work. They removed rotten floor and floor joists. They replaced the floor joists and the plywood. At 5 AM I went in with my crew and we primed the floor and sealed up the joints in the wood and the screw holes. At 6:30 AM we laid the floor. At 8 we put a glaze coating on the floor and by 10:30 the restaurant workers were on the floor prepping for lunch. The floor installation from start to traffic took just 5.5 hours.
Polyurethane Decking Systems
Polyurethane Decking – http://www.epoxy.com/elastomeric.aspx – is the system best used in areas where maximum flexibility is necessary. This is typically outdoors, waterproof applications like balconies.
Specialized Flooring
We have a number of systems that are specialized flooring like conductive and ESD (Electrostatic Dissipative) flooring – www.epoxy.com/conductive.aspx – and various hybrid systems. If your project does not seem to fit in the categories above email me at norm@epoxy.com or call us at 352-533-2167.
In conclusion we offer many types of seamless flooring systems, they can be used for commercial and residential applications. These systems are durable, economical, and easy to install even by homeowners. These seamless flooring systems may be made out of epoxy, polyurethane, or methyl Methacrylate (MMA). Seamless flooring systems are available in multicolored or solid colored. They range in chemical resistance from very good to resistant to aggressive chemicals. When in doubt what is right for your project send me an email at norm@epoxy.com or give me a call at 352-533-2167.
About 20 years I had a half way house that came to me and wanted a virtually indestructible waterproof group bathroom. They needed it to be like a shower enclosure for the entire bathroom, and toilet facility. It needed to be easy to thoroughly clean and disinfect.
The resulting system allows you to hose down the entire ceiling, wall and floors. The system that we developed is a completely seamless, waterproof ceiling and coating system. This epoxy ceiling and wall coating is seamlessly integrated with a seamless flooring system. This system is now being used for everything from clean rooms to animal facilities to car washes, daycare centers, assisted living facilities, food processing facilities and more.
The System
Ceiling and Walls
Prime the ceiling and walls with Epoxy.com Product #899 Primer – www.epoxy.com/899.aspx. Product #899 Primer is a 100% solids, low viscosity, moisture tolerant epoxy. It soaks deeply into the substrate, verifies surface preparation, and helps to prevent the much thicker coating from getting bubbles that may be cause by air or moisture trying to escape from the substrate during curing. Allow primer to get hard to the touch.
Before the epoxy primer is 24 hours old (and after the primer is hard to the touch) apply a coat of Epoxy.com Product #1W. The 1W – Wall Coating is 100% solids. It comes in a range of different colors. This means it is zero (0) VOC with no solvent. Just like the 899 Primer the 1W has very little odor. We have even more chemical resistant wall coatings for applications where it is chemicals that are being splashed or sprayed. Contact us if you have strong chemical exposures that you want to contain instead of water.
Let the first coat harden to the touch and before 24 hours add another coat of #1W. Allow the coating to dry over night.
Seamless Epoxy Cove – Optional
Typically the cove is only installed if you are going to install one of the multi-colored flooring systems (Waterproof Floor Options 2 & 3below). Cove is covered in an earlier blog – https://news.epoxy.com/2014/06/25/seamless-epoxy-cove-installation-instructions/. The cove gives you a radius at the bottom of the wall making the floor to wall transition easy to clean and esthetically pleasing.
Seamless Epoxy Flooring System
There are multiple systems that you can use for your seamless flooring portion of the system.
Water Proof Floor Option 1 – Seamless Epoxy Floor coating:
Floor Coating System – www.epoxy.com/1.htm. Product #1 applies with the Product #899 primer under it and in 2 coats just like the 1W. The Product #1 is thinner and flattens better on a floor than the Product #1W. You can also add an optional anti-skid to the #1 Floor Coating. The #1 comes in all the variety of colors of #1W.
Chip Flooring System – www.epoxy.com/chip.aspx is a two component 100% Chemical Resistant Epoxy Chip Flooring. System #315 Seamless Epoxy Multi-Colored Chip Flooring is available in virtually limitless color combinations. If your job is big enough our chips can be pigmented to match all the colors of many major paint companies. We can color match our base coat colors as well. Unless the pigments for your custom colored 315 Basecoat are unusually expensive we can color match for a modest small batch charge or at no charge for larger orders. Even our standard color pallet offers you over 45 chip colors that can be blended in any combination and percentage as you want. This gives you the architectural choices you need. The top coating for this system is highly UV resistant so since it doesn’t chalk indoors it can last and look great for decades.
Quartz Flooring System with Product #15 – www.epoxy.com/15.aspx – is also an excellent flooring system for those who like the colored sand look with a good midrange chemical resistant system.
Waterproof Floor Option 4 – Seamless Chemical Resistant Flooring:
We can also help you to combine the systems above with our Novolac Epoxy Systems – www.epoxy.com/novolac.aspx for highly chemically resistant versions of those systems. You can also install an Electro-Static Dissipative or Conductive system www.epoxy.com/conductive.aspx.
In conclusion the systems above are only a small fraction of the possibilities. With our wide range of colors and chemically resistant systems the possibilities are endless. Please contact Epoxy.com Technical assistance at 352-533-2106 or email me directly at norm@epoxy.com.
Epoxy.com is open and shipping product. We provide critical products including repair materials, seamless coatings and flooring systems capable of handling many of the new challenges we are now facing in easy to disinfect surfaces.
We take the service we provide by way of our products and installation tech support very seriously. We are a family owned business and we run our business as family. Please be assure that we are practicing social distancing as a company and as individuals to do our part to stay healthy.
We are all in this together. Please do not hesitate to contact me personally at norm@epoxy.com or 352-533-2167 for anything I can do to help with our products to make things easier for you and your people to stay safer.


 Posted by Norm Lambert
  the crack. It can also cause hydraulic lifting, rupturing of the cracked substrate, or further elongation of the crack. Low pressures allow gradual resin flow into the crack for deeper penetration. On vertical cracks, injection is start at the lowest point, and continue upward on the crack area. While injecting the lowest port, resin will flow to and out of the next higher port.
 and move to the next port. Then injection continues in the port showing resin flow. This procedure continues until all ports are full.
 conditions, the resin will not bond to the substrate and no structural rebonding will result. It is usually safer to preheat the portion of the structure you are injecting.
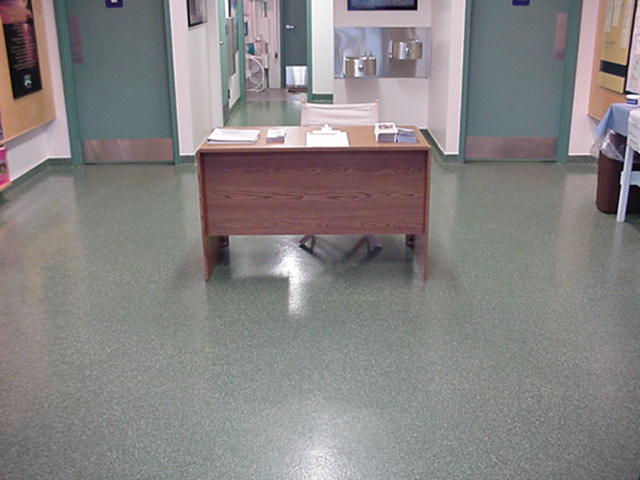


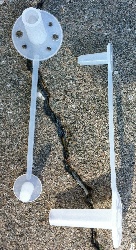
 Often inadequate design for expansion/contraction is the cause for parking garage structural cracking. Avoid weld injecting a crack if there are not enough expansion joints. Sometimes flexible overlays such as
 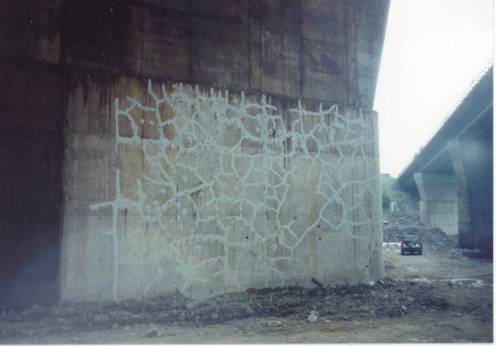 Structural restoration of concrete by epoxy injection is very often the only alternative to complete replacement. It therefore results in large cost savings. Injection protects the rebar and stops water leakage.
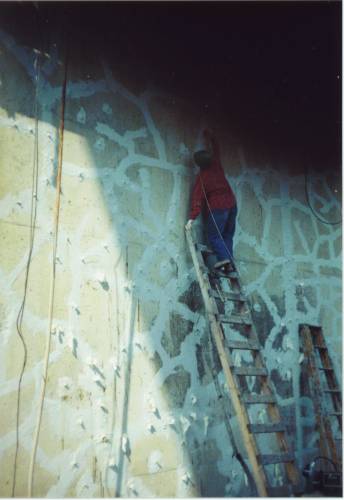 ral value. Loosing the entire structure is often the result.
 Today we will discuss all the uses of

 the pothole, then re-cut your joint with a concrete saw as shown in the diagram here. The Product #12 can also be mixed with silica sand and used to repair areas in the center of a slab that might have started as a random crack or because of a chemical spill or due to impact damage.
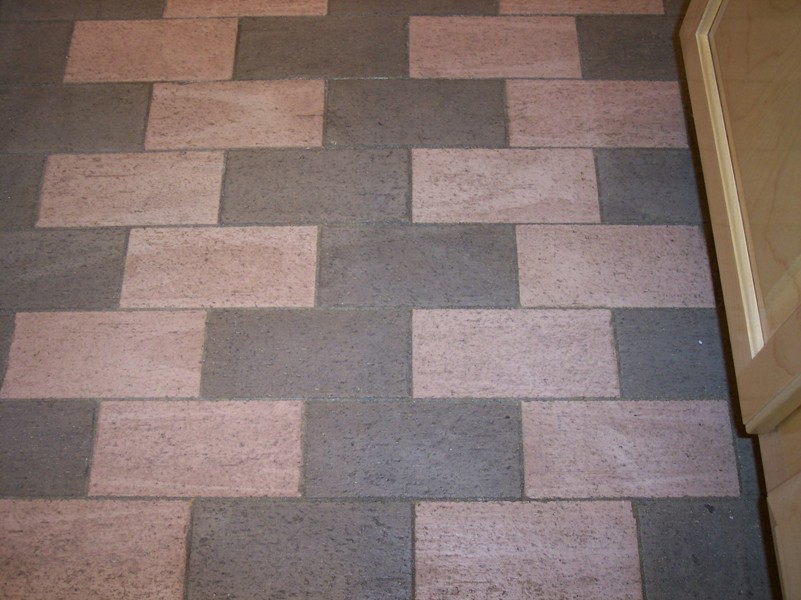
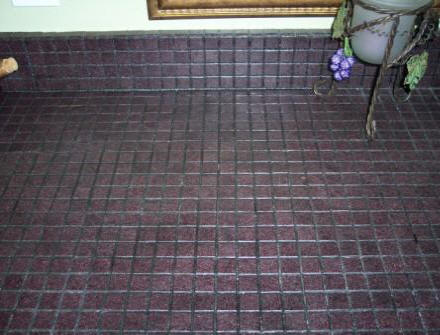
 Click the picture

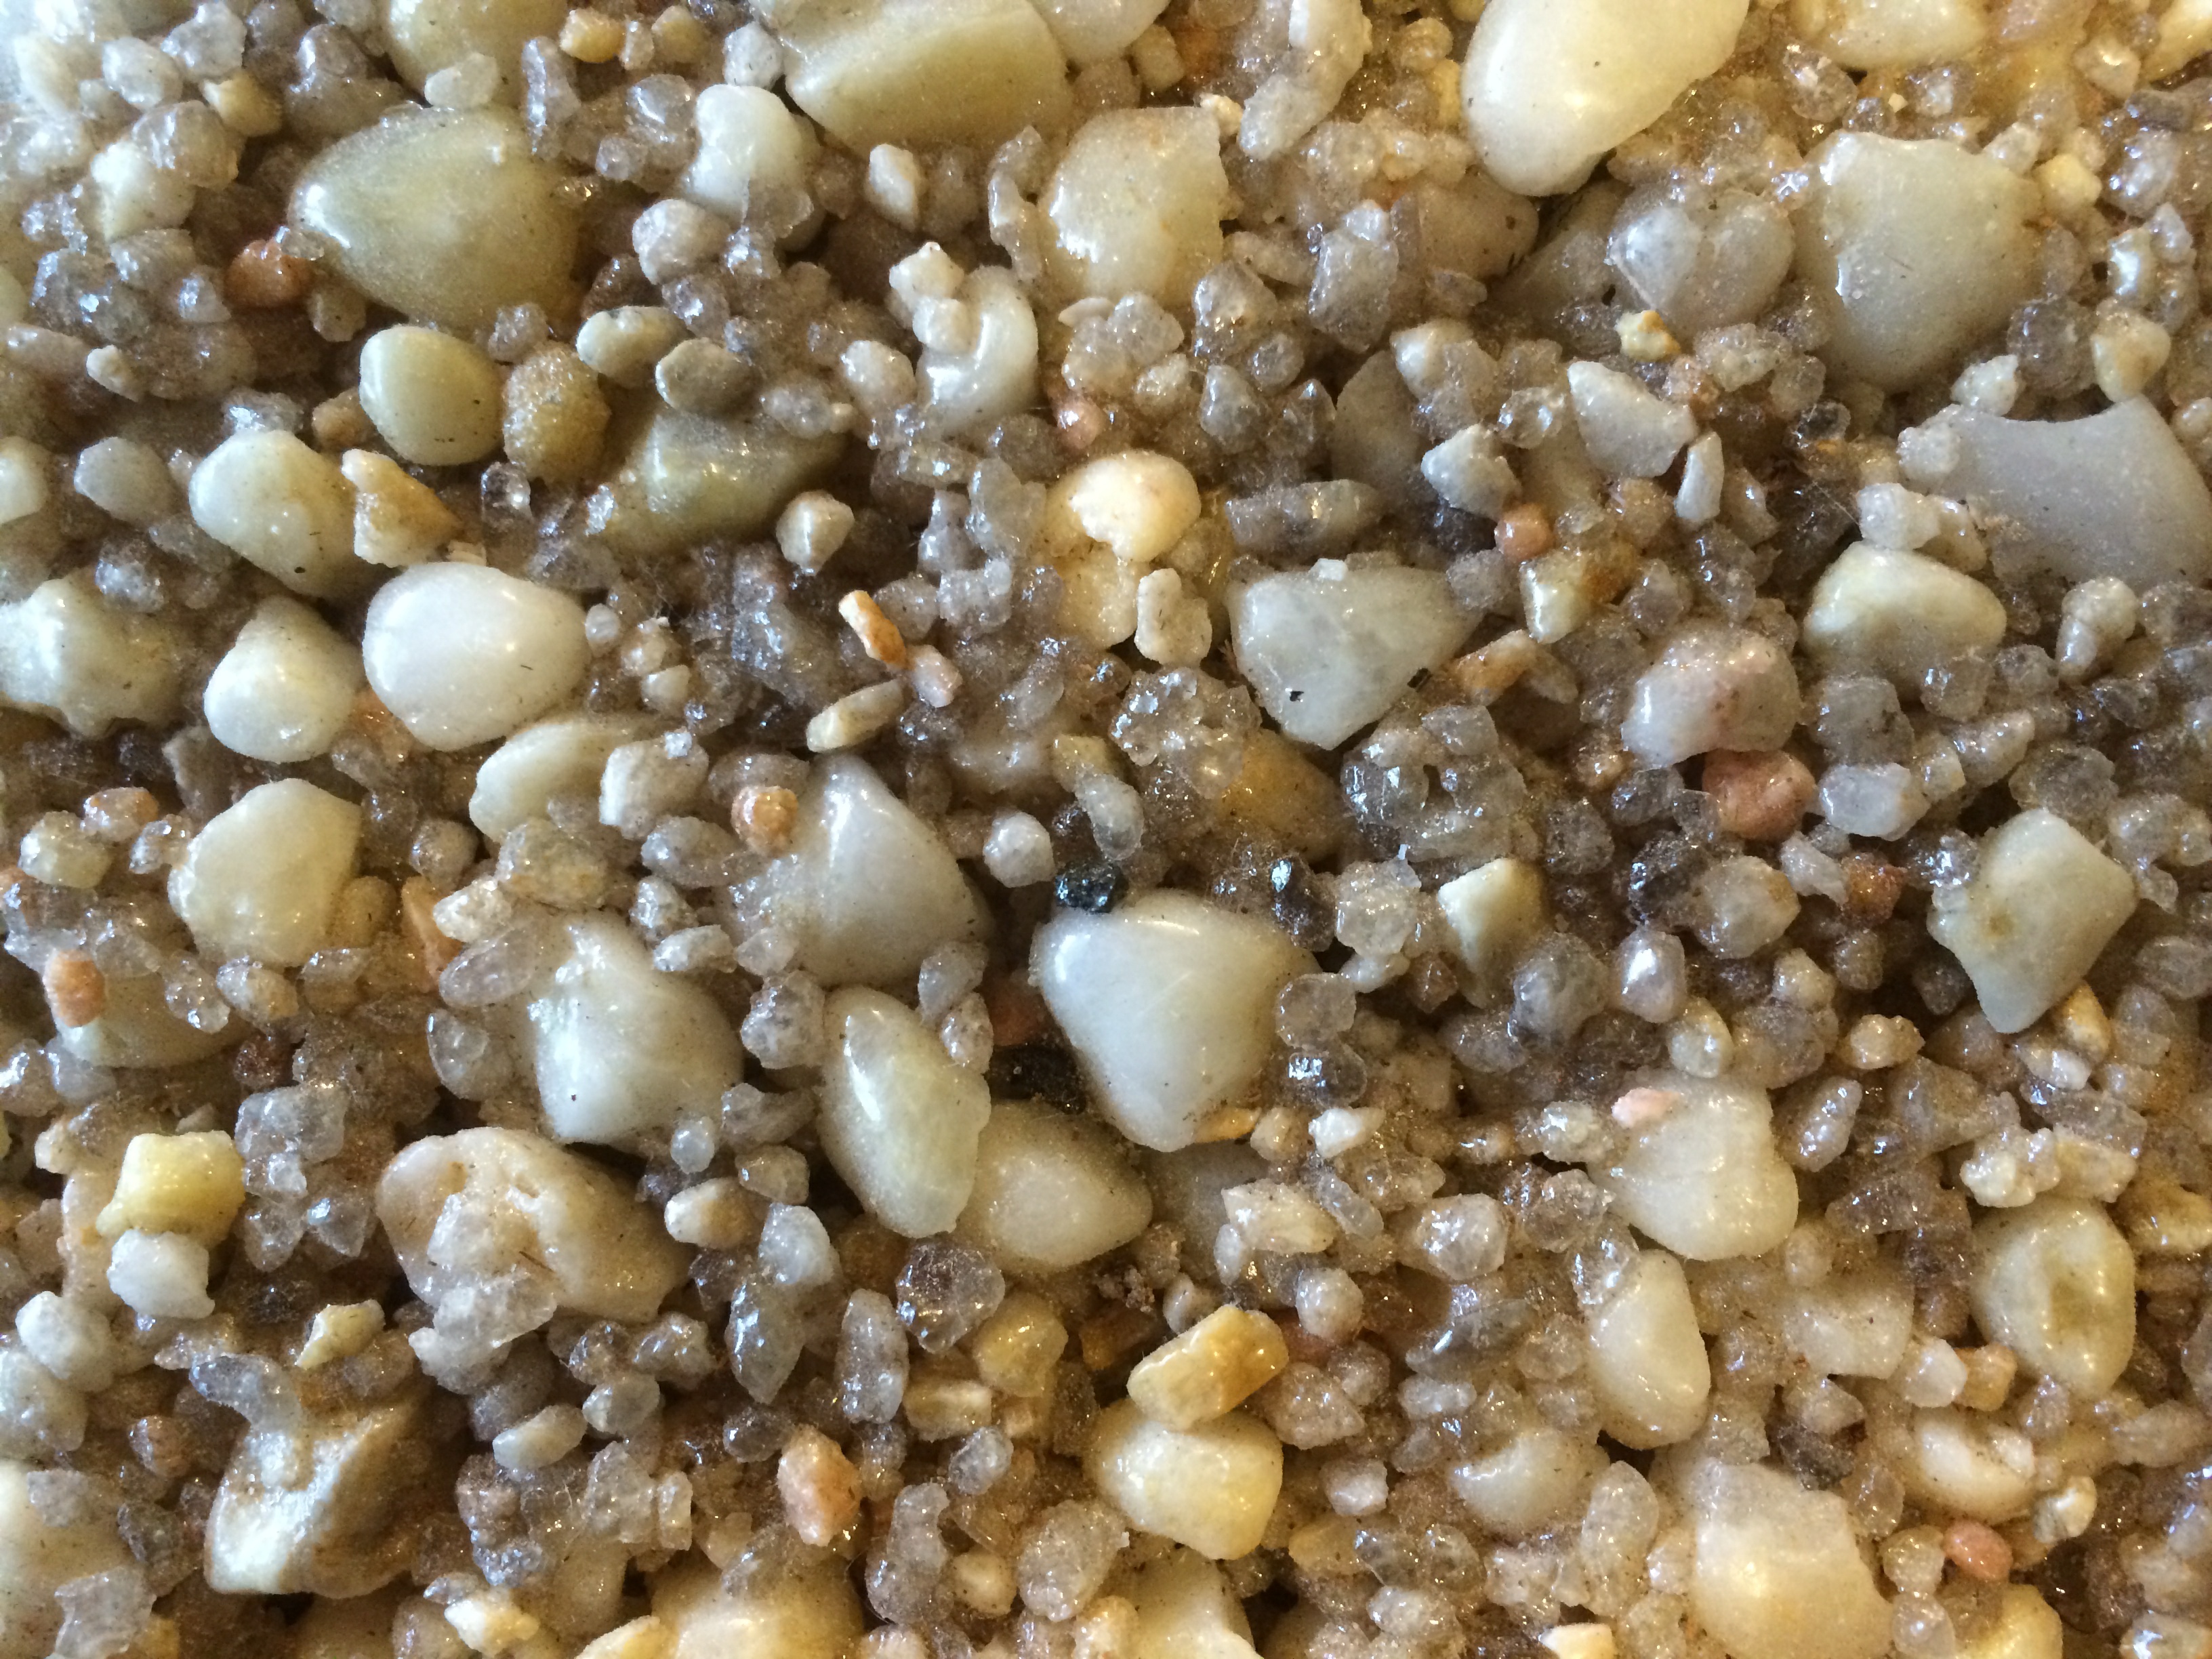


 This is the second half of a 2 part of a series on basement waterproofing with epoxy. In Part 1, we discussed waterproofing block wall foundations with epoxy. In Part 2A we discuss how to identify leaks that need waterproofing in basement walls, and floors that are made out of poured concrete. In this part (2B) will deal with epoxy injection repairs of cracks in poured concrete, that cause the leaks.
 You need to determine the spacing of ports to be set. The spacing is a factor of the tightness of the crack and the depth of the concrete substrate. Spacing is normally between four (4) and eight (8) inches.

 Fresh (plastic) concrete doesn’t bond to hardened concrete. The exception is when a special epoxy bonding agent like Epoxy.com Product #2007 – is used (this bonding agent will be discussed in a future article). When concrete has hardened or has started to harden and you pour more concrete against it (without the right bonding agent) you get what is called a cold joint. These cold joints are a common source of water leaks.
 You can also get cold joints in the middle of concrete walls and floors due to multiple pours. You can get cold joints if concrete is setting to fast and fresh concrete is poured against semi cured concrete. Sometimes saw cuts in the floor can be a source of leaks
 These cracks are one of the easiest ways for water to get into your basement. If the water makes it to the fill side of the tank (under the floor or against the wall) it will typically leak out into your basement. You should look carefully for these cracks when looking for potential leaks into your basement. If you are able to investigate into the water infiltration into your basement when it is leaking it will be easy to see. If trying to find the source of leaks when the basement is dry you have to look for water marks on either side of the cracks and beneath the areas that might be leaking.
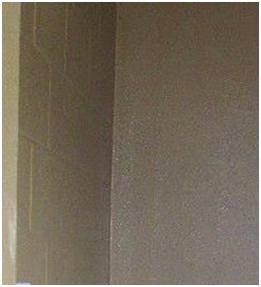 Many homes and businesses experience leaky basements year after year. The worse time is in the spring after winter accumulation of snow. There are a number of prudent things that you can do to improve drainage against your foundation like roof gutters, grading and improvement of drainage. The recommendations here do not replace that conventional wisdom. It is designed to augment and improve upon these conventional methods.


