This is the third in a series on Infrastructure Repairs Using Epoxy. Part One is Introduction to Epoxy Injection. Part 2 is Crack Analysis Before Epoxy Injection
If your have not read that yet you may want to go back and read it before you proceed with reading this.
Port Setting
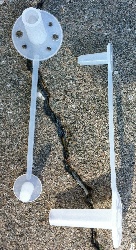
It is extremely important that if drilling to use the right tool. to set drill type ports use a vacuum swivel drill. That is a drill with vacuum attached swivel drill chuck and hollow a drill bit.
Concrete dust can be detrimental to the injection processes in several ways. Any dust remaining in the drill hole near a crack can combine with the very low viscosity injection resin. This thickens your resin turning it into a weak paste. This paste can slow or even block the resin flow. Drilling very tight crack with a solid drill forces dust into the crack. This seals the crack from resin flow. Do not allow shortcuts in the drilling procedures! However, for most applications the surface port is the easiest and most effective method.
Port Spacing
Determining the spacing of ports is done by a highly experience applicator. This spacing is a factor of the tightness of the crack and the depth of the concrete substrate. Spacing is normally between four (4) and eight (8) inches.
Port Setting and Sealing
Align ports directly over cracks. That allows injection resin to flow into the crack. Seal surface cracks. Sealing the exterior of cracks is done with Epoxy Gel type Bonder.
Testing The System
Test cracks that are ill defined, or if dust or debris is in the crack. This testing may be done by injecting water into the crack area.
Water left in the cracks will not effect the injection process or the curing of the Epoxy.com Injection Resin. Heavier injection resin forces the water out the cracks. Water injection helps clean the cracked areas. More important, is that it helps avoid the unexpected. This process of flushing the cracks is commonly skipped by more experience contractors, who can tell if there will be a flow of resin, by just looking at them. However, when in doubt water testing is a must.
If the cracks contain algae, chlorinated water containing copper sulfate is injected. After pumping this mixture is left over night. The next morning the crack is flushed by pumping fresh water, into it. This flushes it out before resin injection begins.
Efflorescence builds up on the bottom of a crack in a horizontal slab. Water in the crack extracting soluble calcium hydroxide is the cause. The water evaporates at the surface leaving the lime, which later reacts with the carbon dioxide in the air to form limestone. The inside of the crack, is frequently free of limestone and making it suitable for injection.
Part 4 of this series: Injection Resin Materials Product Selection.
For more information visit our website at http://www.epoxy.com, email us at info@epoxy.com or call our technical service department at +1 (352) 533-2167.

[…] Part 3: Setting Epoxy Injection Ports […]